Last Updated: 2021-05-25
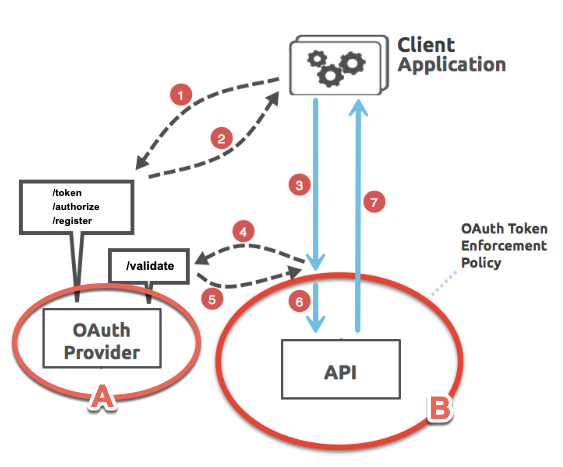
This guide provides an overview on how to set up and enable the OAuth 2.0 access token enforcement using Mule OAuth provider policy in API Management in the Anypoint Platform. This policy allows you to configure a single OAuth provider for multiple APIs.
To manage APIs using this policy, you first build and deploy a Mule OAuth provider application (Circle A in the diagram above) that verifies the validity of OAuth 2.0 credentials. An example provider template is provided here on Github. Circle B in the diagram above will be the API application or proxy that is deployed to Runtime Manager.
Requirements / Prerequisites
- Anypoint Platform Account
- Anypoint Studio 7.9
- Mule 4.3.0
- OAuth 2.0 Provider Template - Mule 4.x
- Postman
Additional Resources
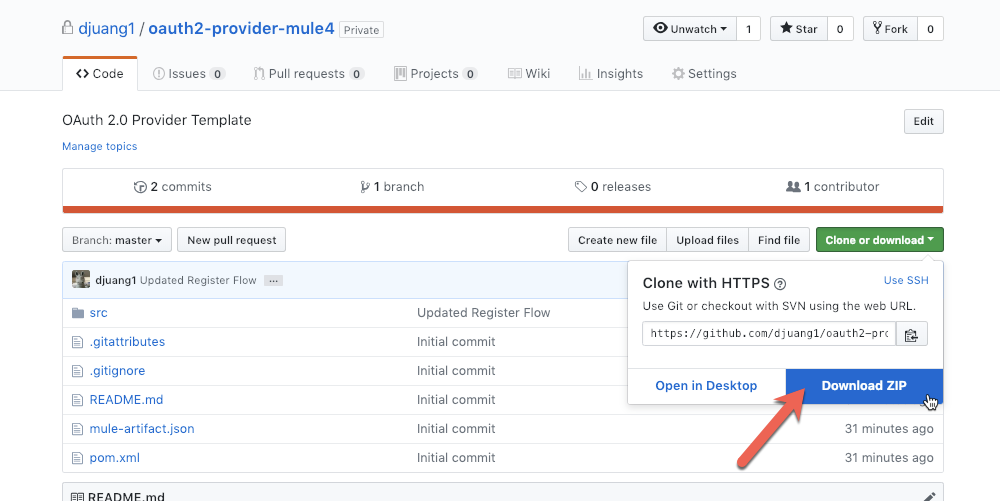
To apply the OAuth 2.0 Access Token Enforcement Policy, you must first configure and deploy your own provider application that verifies the validity of OAuth 2.0 credentials. This application will be referenced in the policy and used to generate and validate the OAuth 2.0 token. To get started, download the template from Github using this link: https://github.com/djuang1/oauth2-provider-mule4
Once you download the *.zip file, uncompress the file.
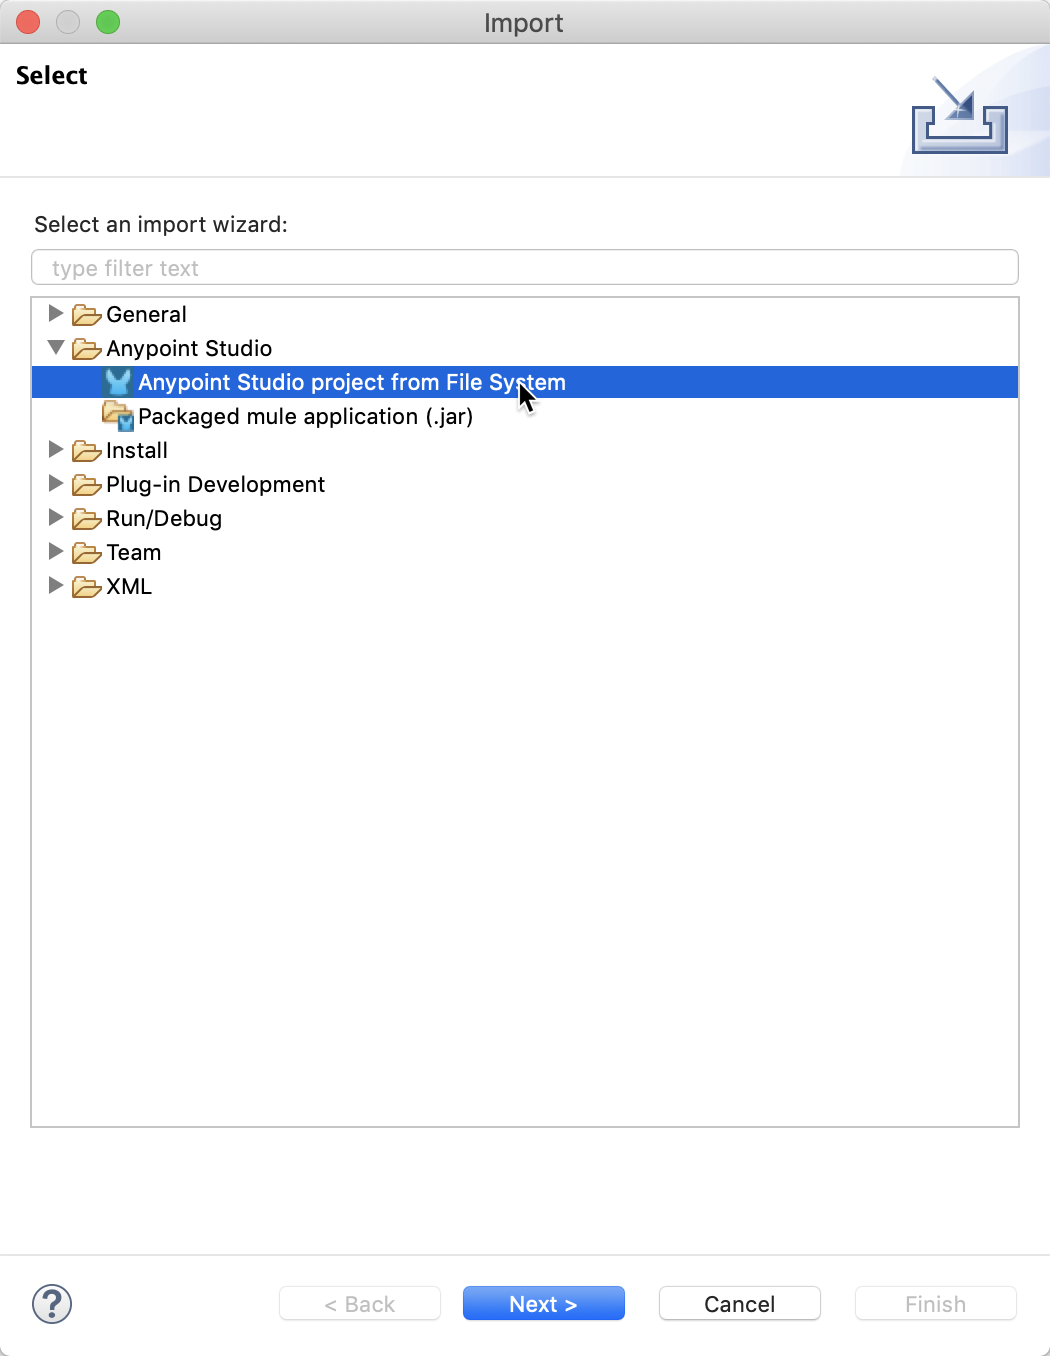
In Anypoint Studio, click on File > Import
Expand the Anypoint Studio node and select Anypoint Studio project from File System and click on Next
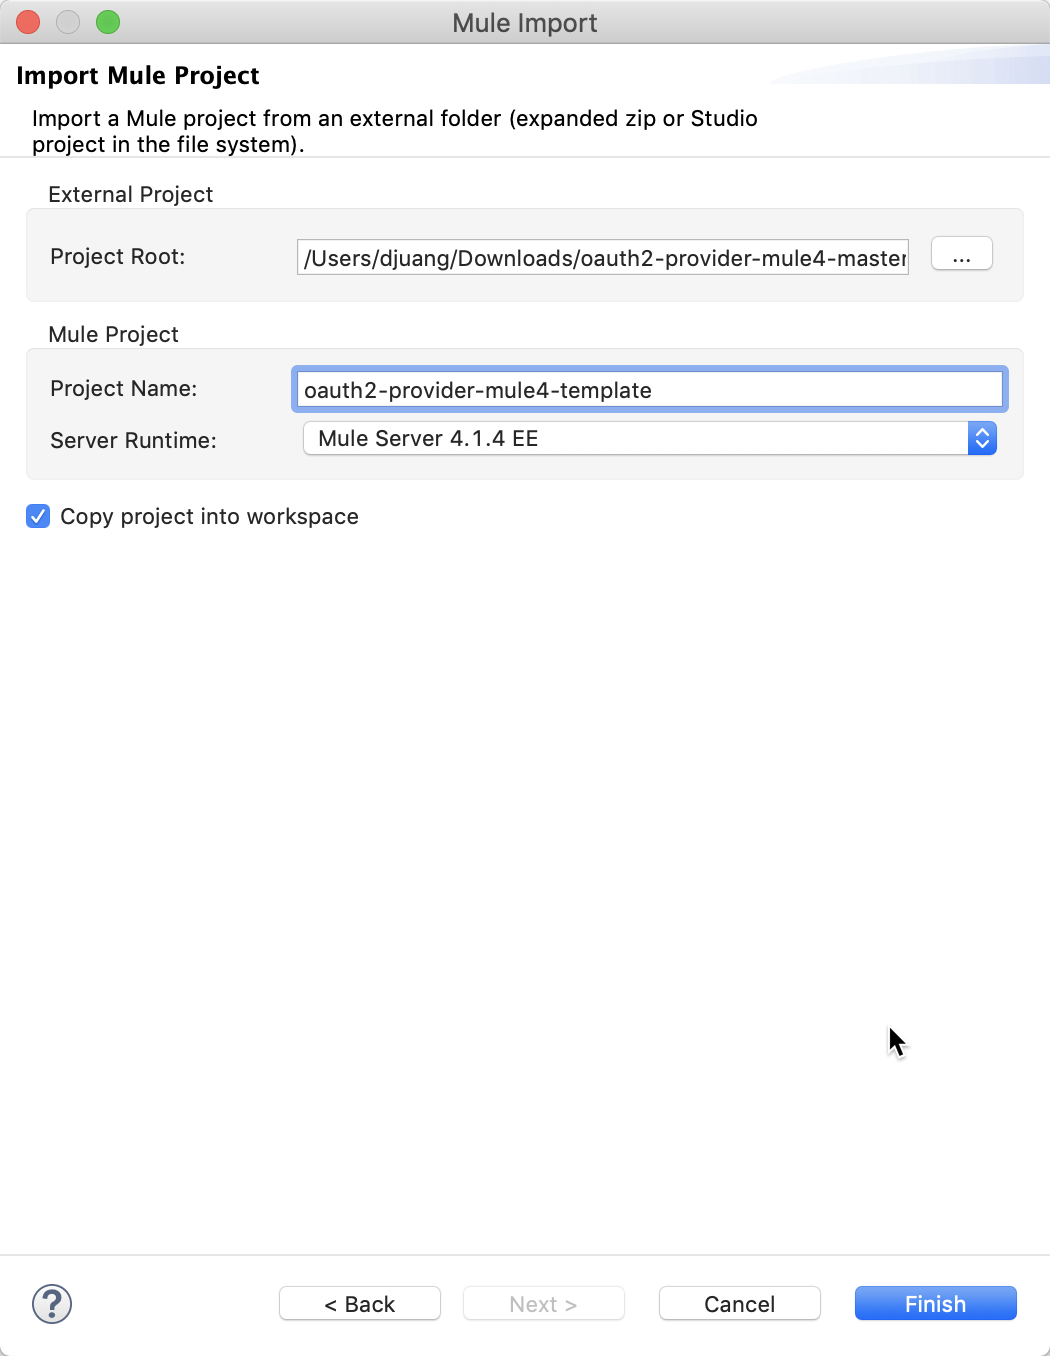
Browse to the uncompressed project from Github and expand and select the folder for the project. Click on Open
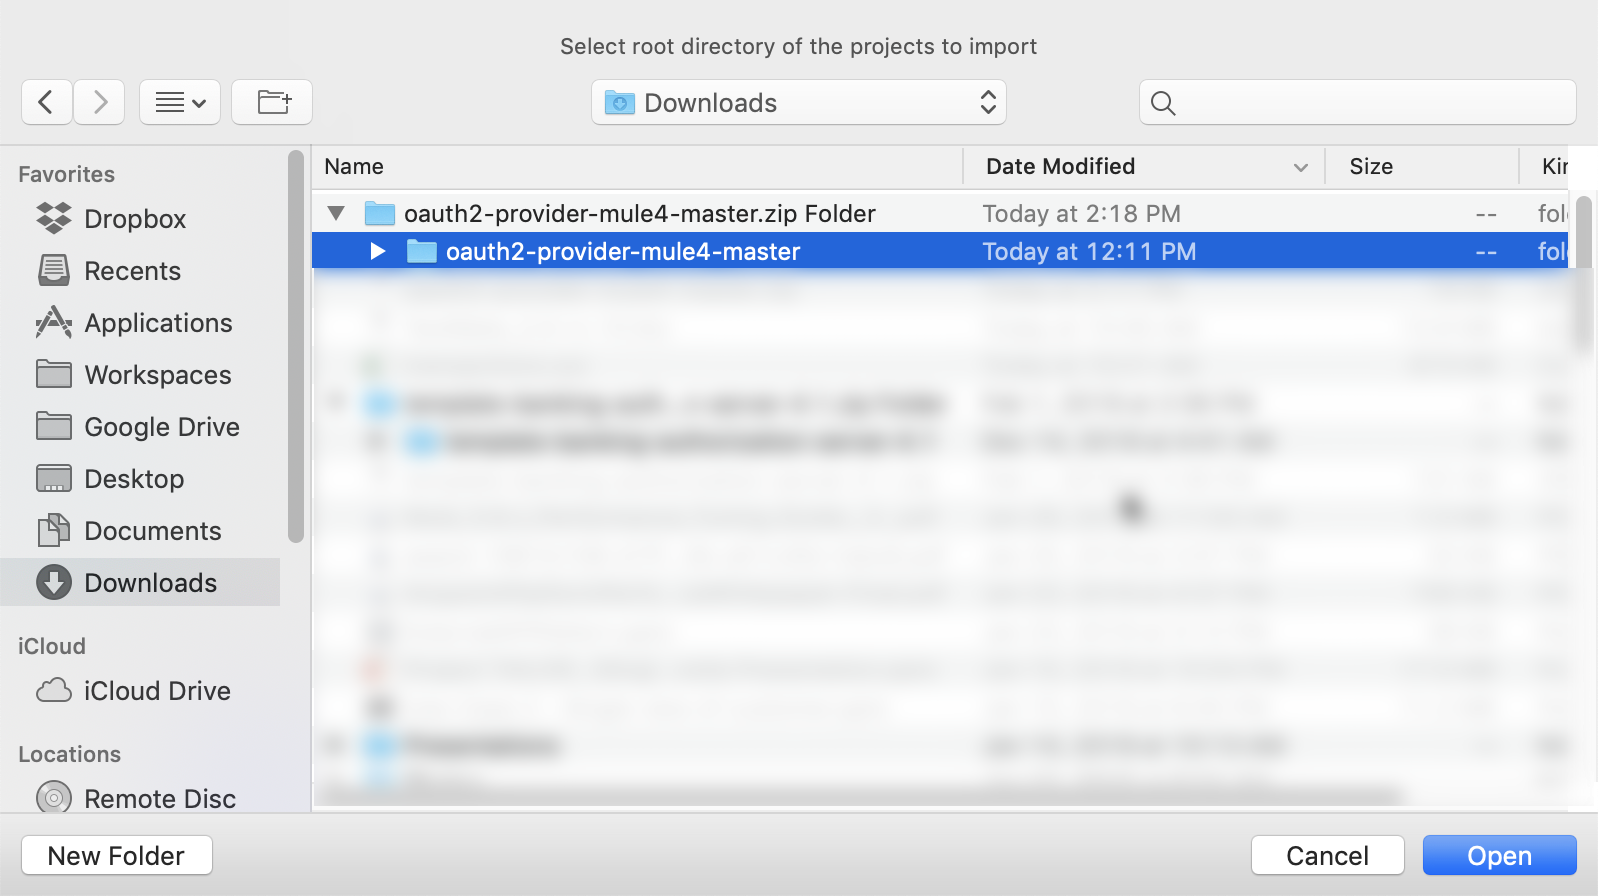
In the Mule Import window, click on Finish
Let's look at the project and breakdown the different pieces.
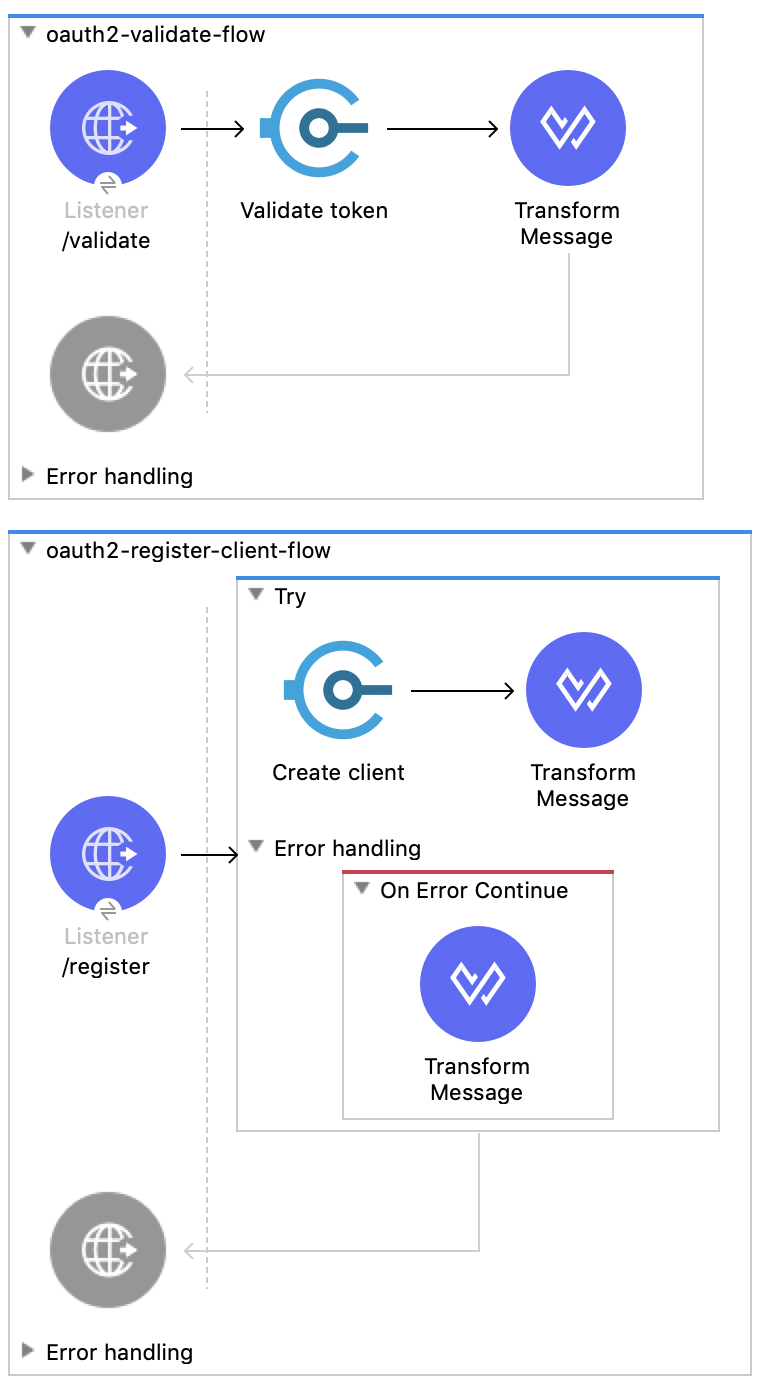
In the project are two flows, the oauth2-validate-flow provides the endpoint to validate the token. The oauth2-register-client-flow allows you to register new clients against the OAuth provider. The OAuth 2.0 Provider connector also exposes two additional endpoints that aren't displayed as flows. These paths can be configured but for the purpose of this template, I'm using the following:
/authorize
/token
These are part of the OAuth dance and will be needed when you configure the RAML for the API that will be protected by the OAuth 2.0 provider.
Next, expand the src/main/resources folder.
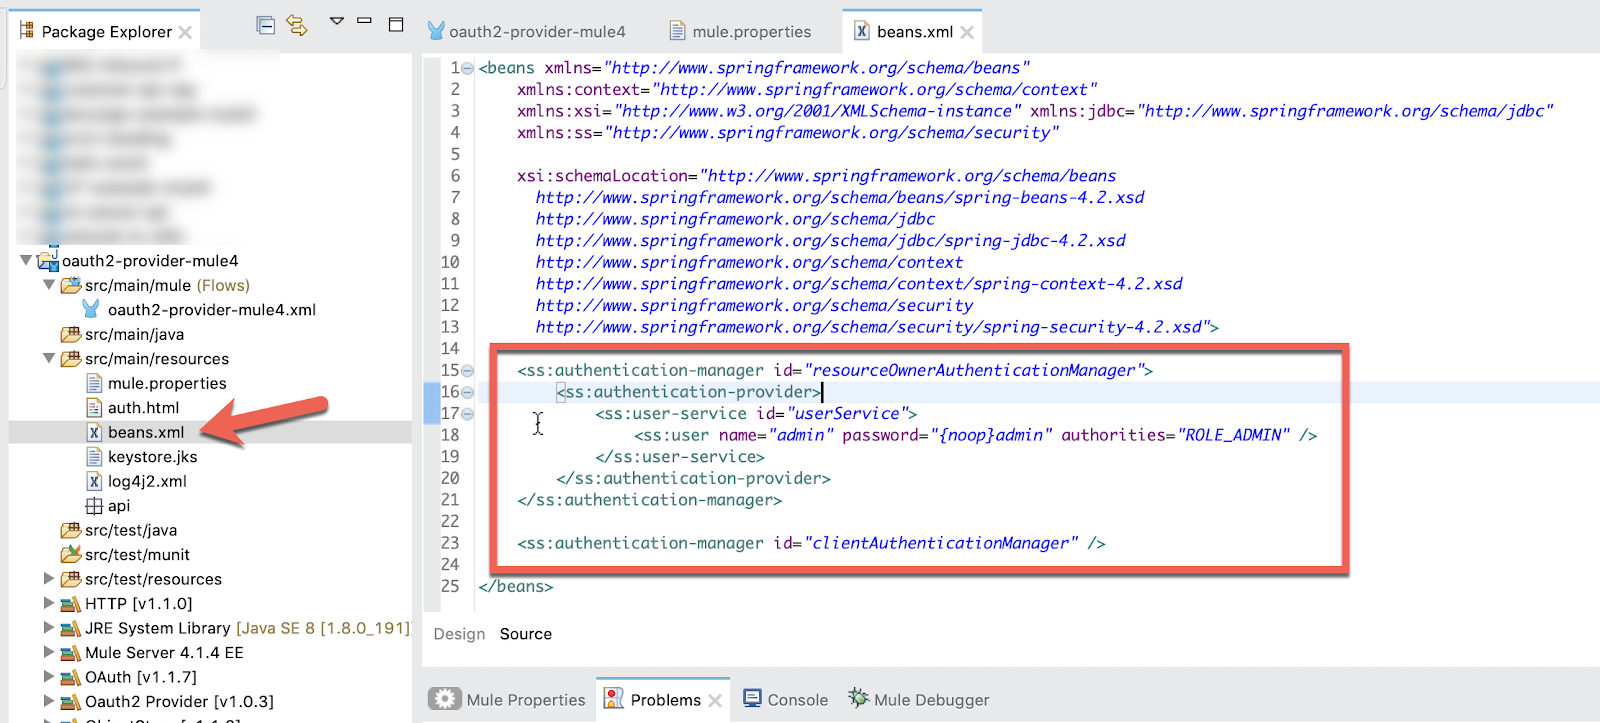
Open the beans.xml file. The template uses the Spring Security module to manage users. You can add additional users here. Additionally you can extend this module with Spring JDBC to authenticate against a database of users.
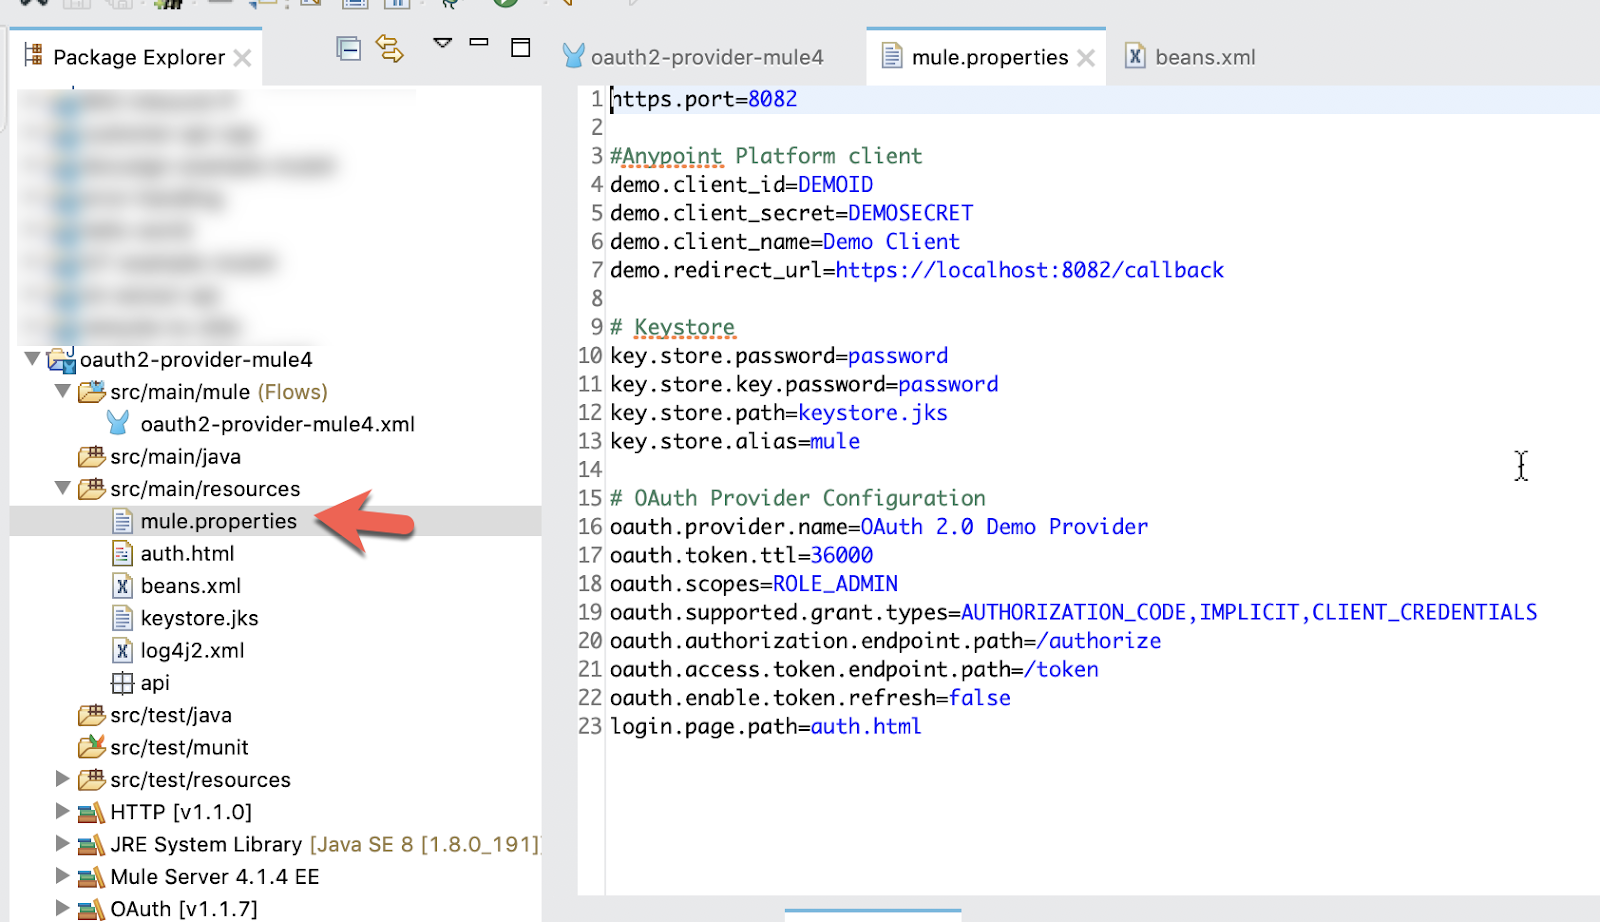
Lastly, let's look at the mule.properties file in the same folder. After you've run this example, you can change the properties to fit your environment.
But for now, copy down the following:
demo.client_id=DEMOID
demo.client_secret=DEMOSECRET
demo.client_name=Demo Client
demo.redirect_url=https://localhost:8082/callback
You'll need these for later when you request a token in Postman.
Go ahead and deploy the application to CloudHub now. You'll probably need to change the application name here. CloudHub doesn't allow for duplicate app names on the service so just add your initials to the app name. (e.g. oauth2-provider-mule4-dj)
Also, be sure to check the Use Object Store v2 checkbox as well.

Once it's deployed to CloudHub and up and running, let's test it.
Open a browser and navigate to the URL for the deployed app. e.g.
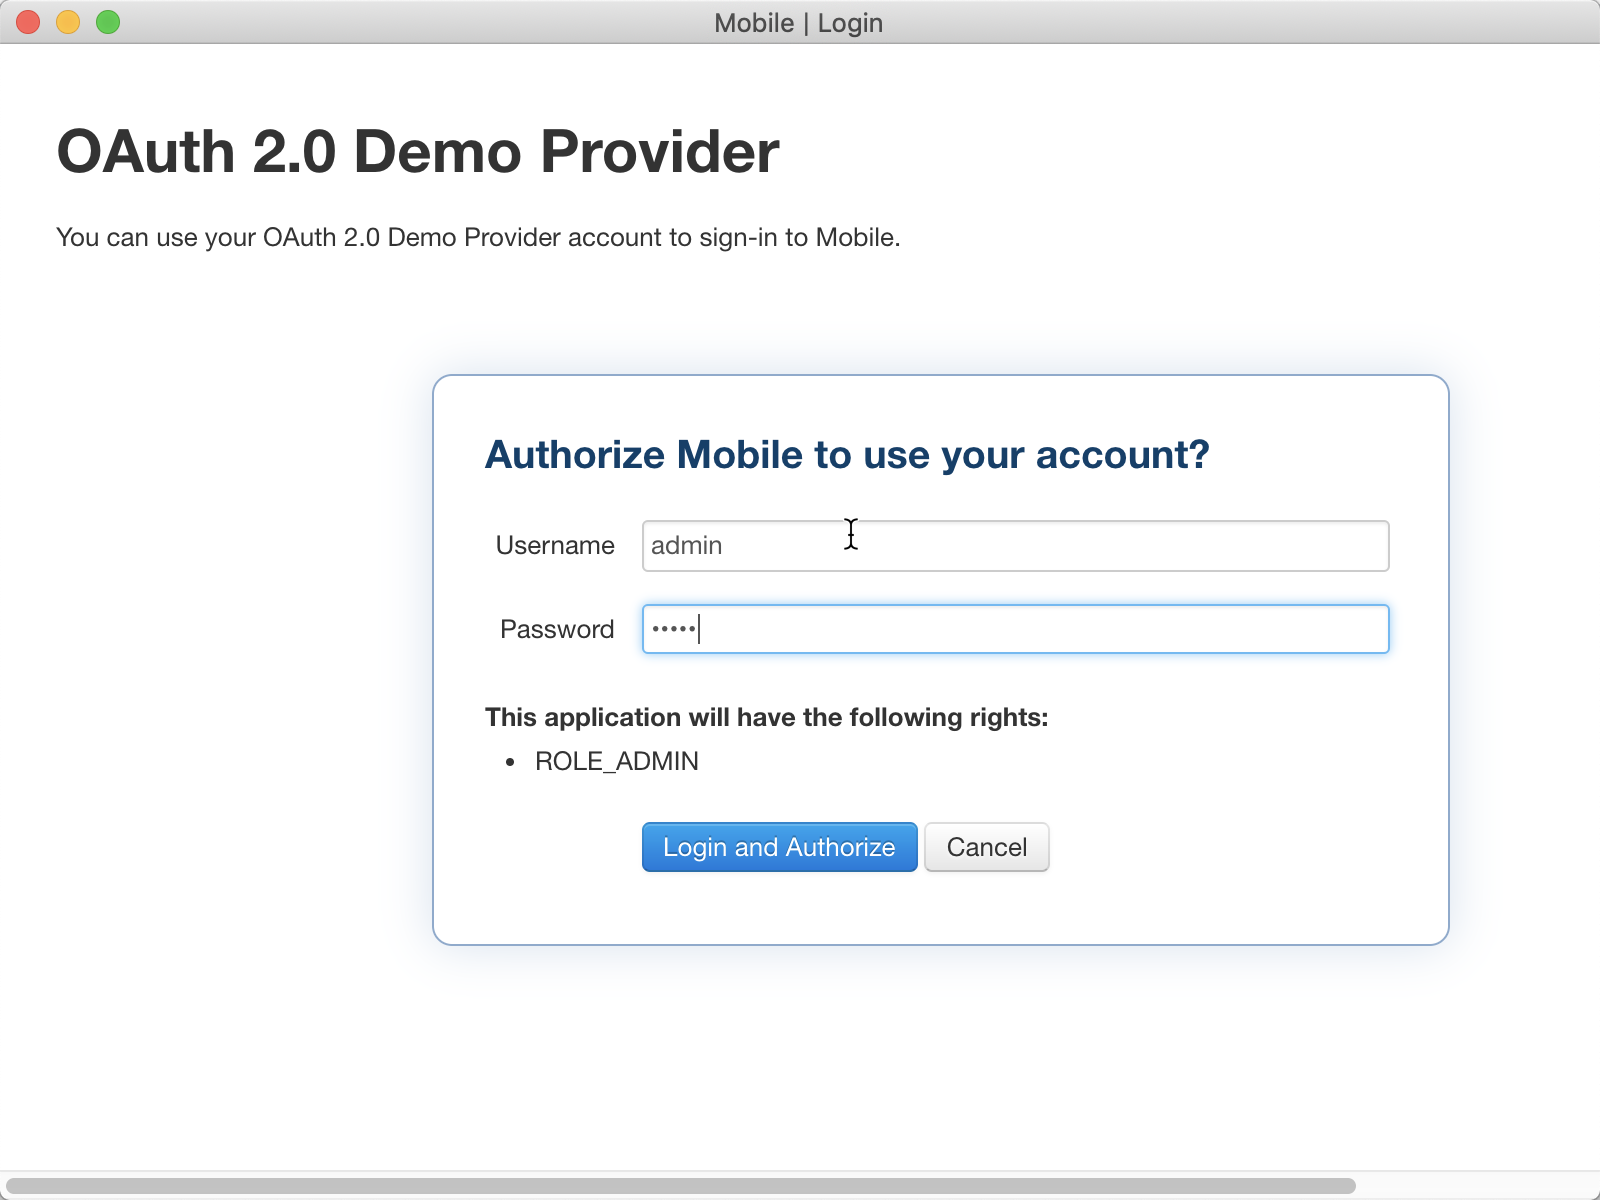
https://oauth2-provider-mule4.us-e1.cloudhub.io/authorize?client_id=DEMOID&redirect_uri=https://localhost:8082/callback&scope=ROLE_ADMIN&response_type=tokenIf successful, you should see the following screen below. I've highlighted where some of the values are populated from the mule.properties file.
Additionally the URL has values that correspond to some of the properties we've configured:
client_id=DEMOID
redirect_uri=https://localhost:8082/callback
scope=ROLE_ADMIN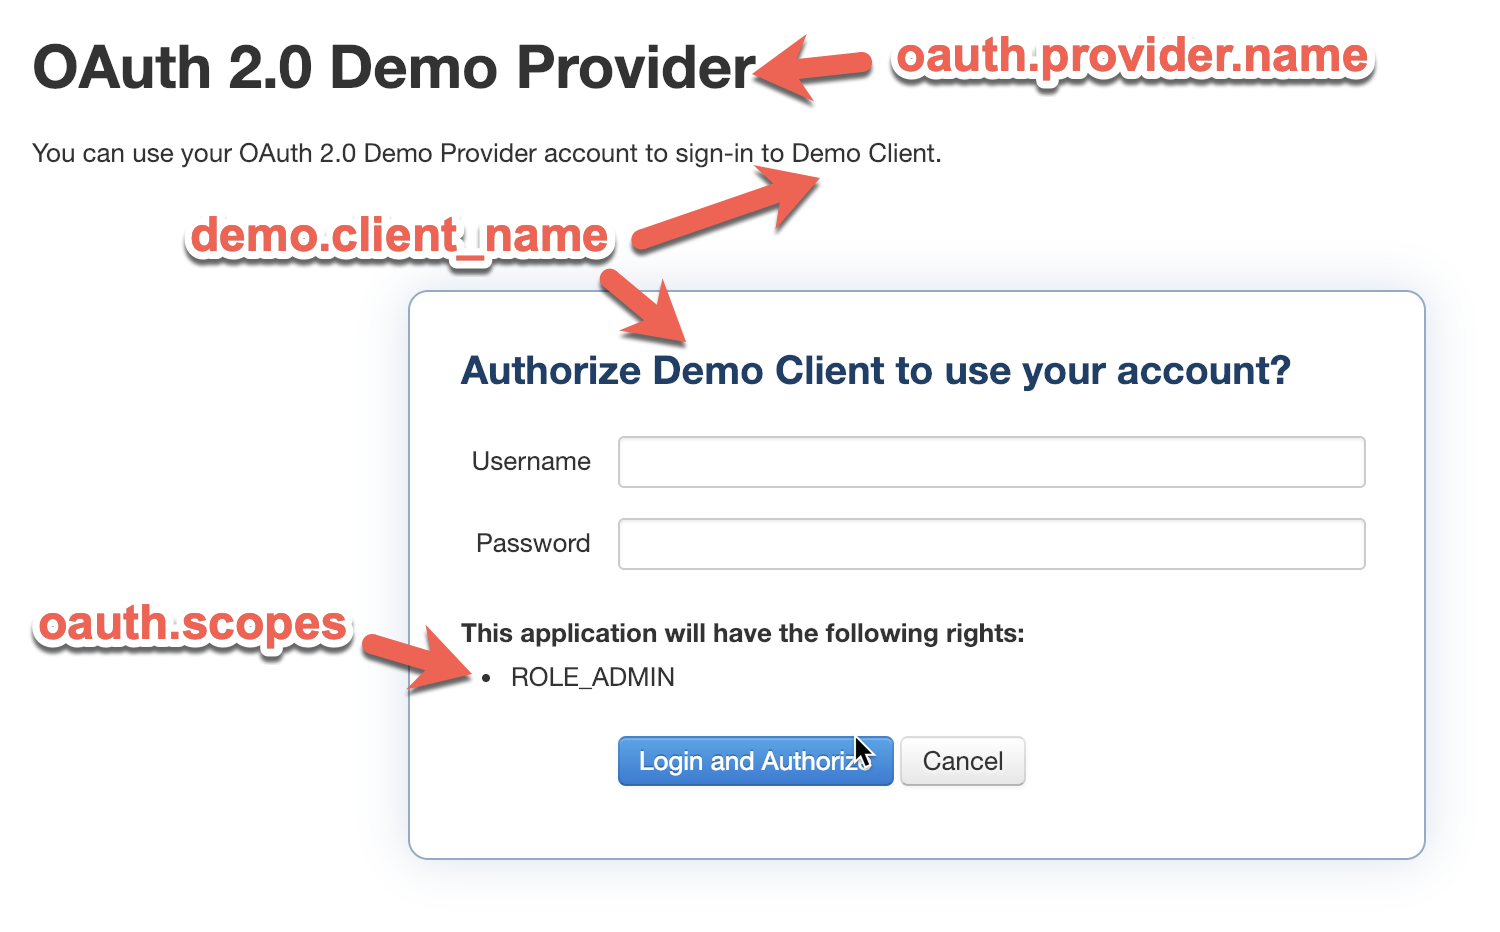
Next, let's look at the /register endpoint. Navigate to the following URL but replace the app URL with your own:
https://oauth2-provider-mule4.us-e1.cloudhub.io/registerYou should see the following in the screenshot below.

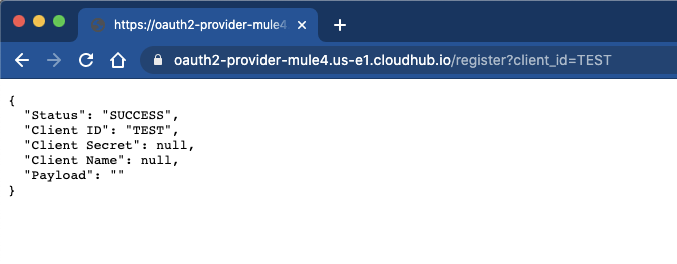
Add a ?client_id=TEST to the end of the URL and you should see the following
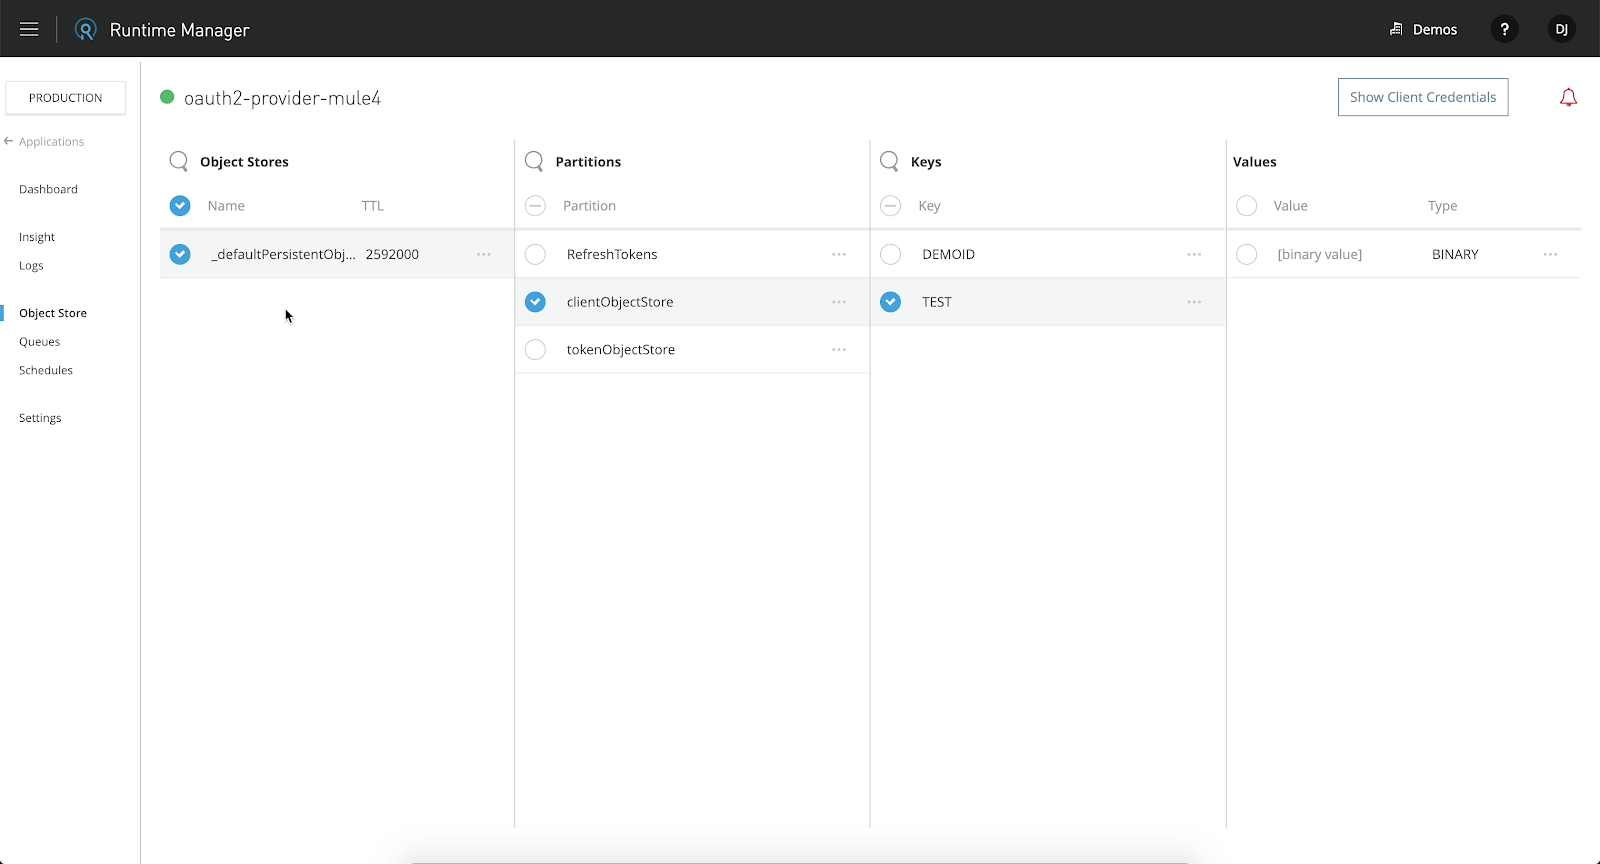
Switching to Runtime Manager, select the deployed application and navigate to Object Store.
Click on _defaultPersistentObjectStore > clientObjectStore and you'll see the newly added Client ID
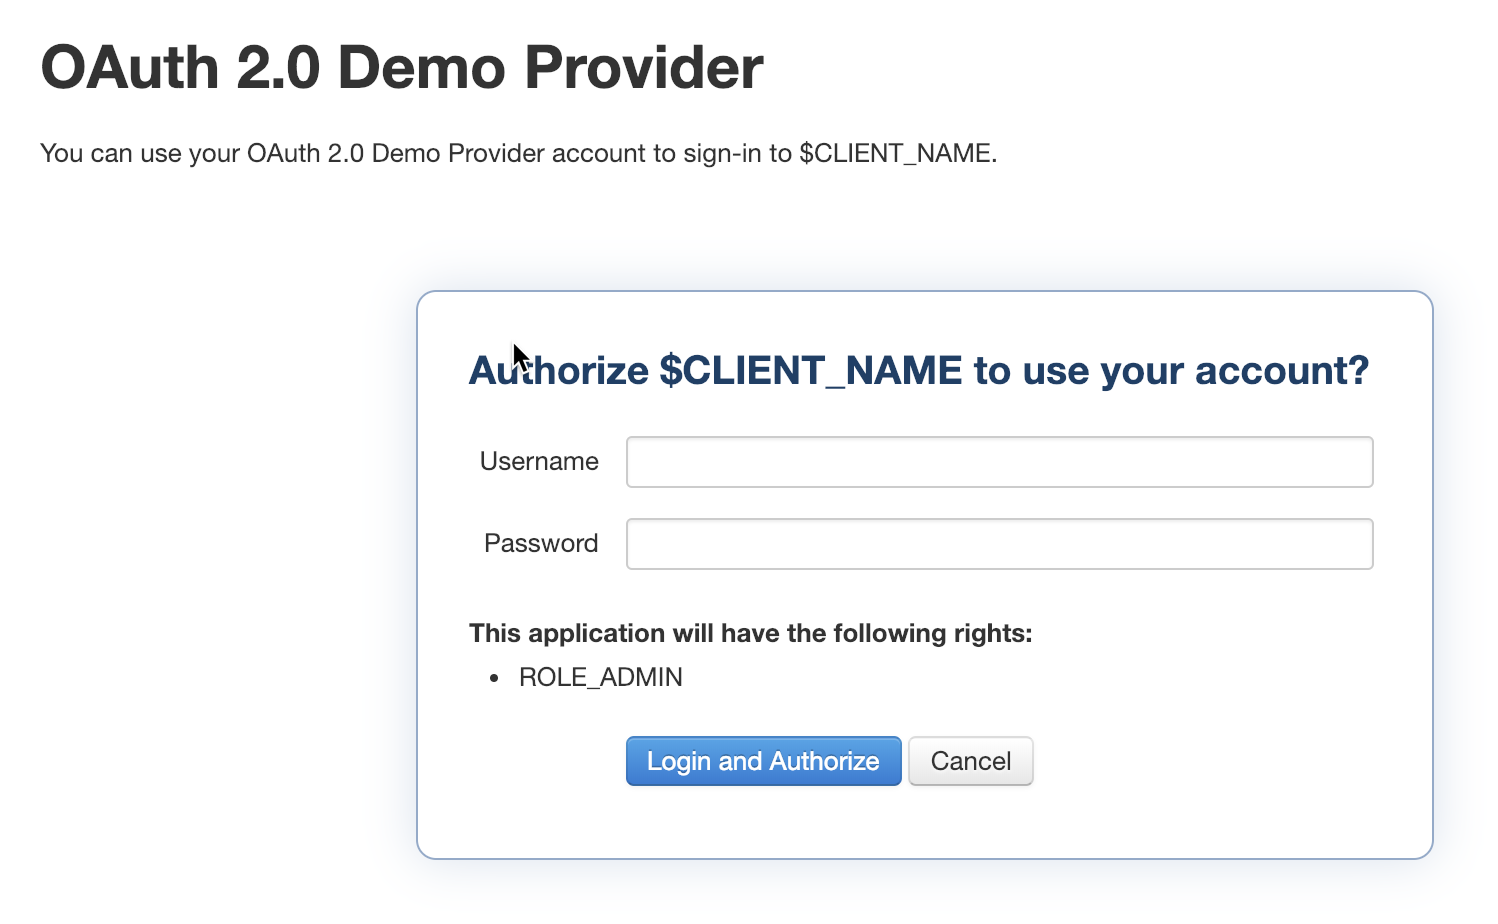
If you change the client_id to TEST in the authorize step:
https://oauth2-provider-mule4.us-e1.cloudhub.io/authorize?client_id=TEST&redirect_uri=https://localhost:8082/callback&scope=ROLE_ADMIN&response_type=tokenyou'll see the following.
Now that you've deployed a provider application, we'll create and deploy an API that will use the application to validate the OAuth token. To simplify and make it easier to learn, we will provide a pre-configured API that you can paste into Design Center and publish to Exchange.
Open Design Center and create a new API specification.
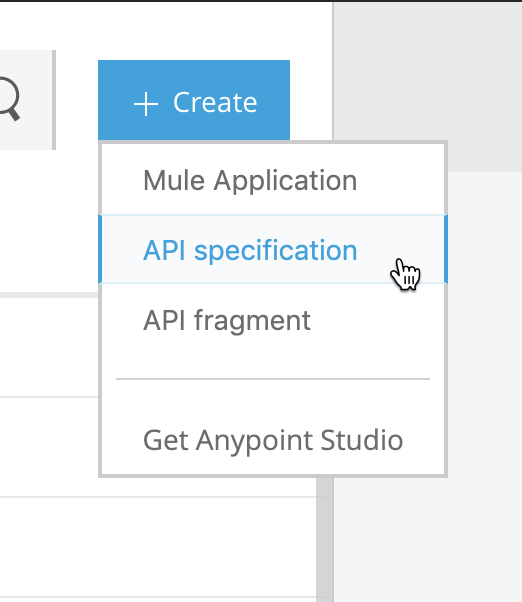
Give the project a name (e.g. Test API with OAuth 2.0) and click on Create
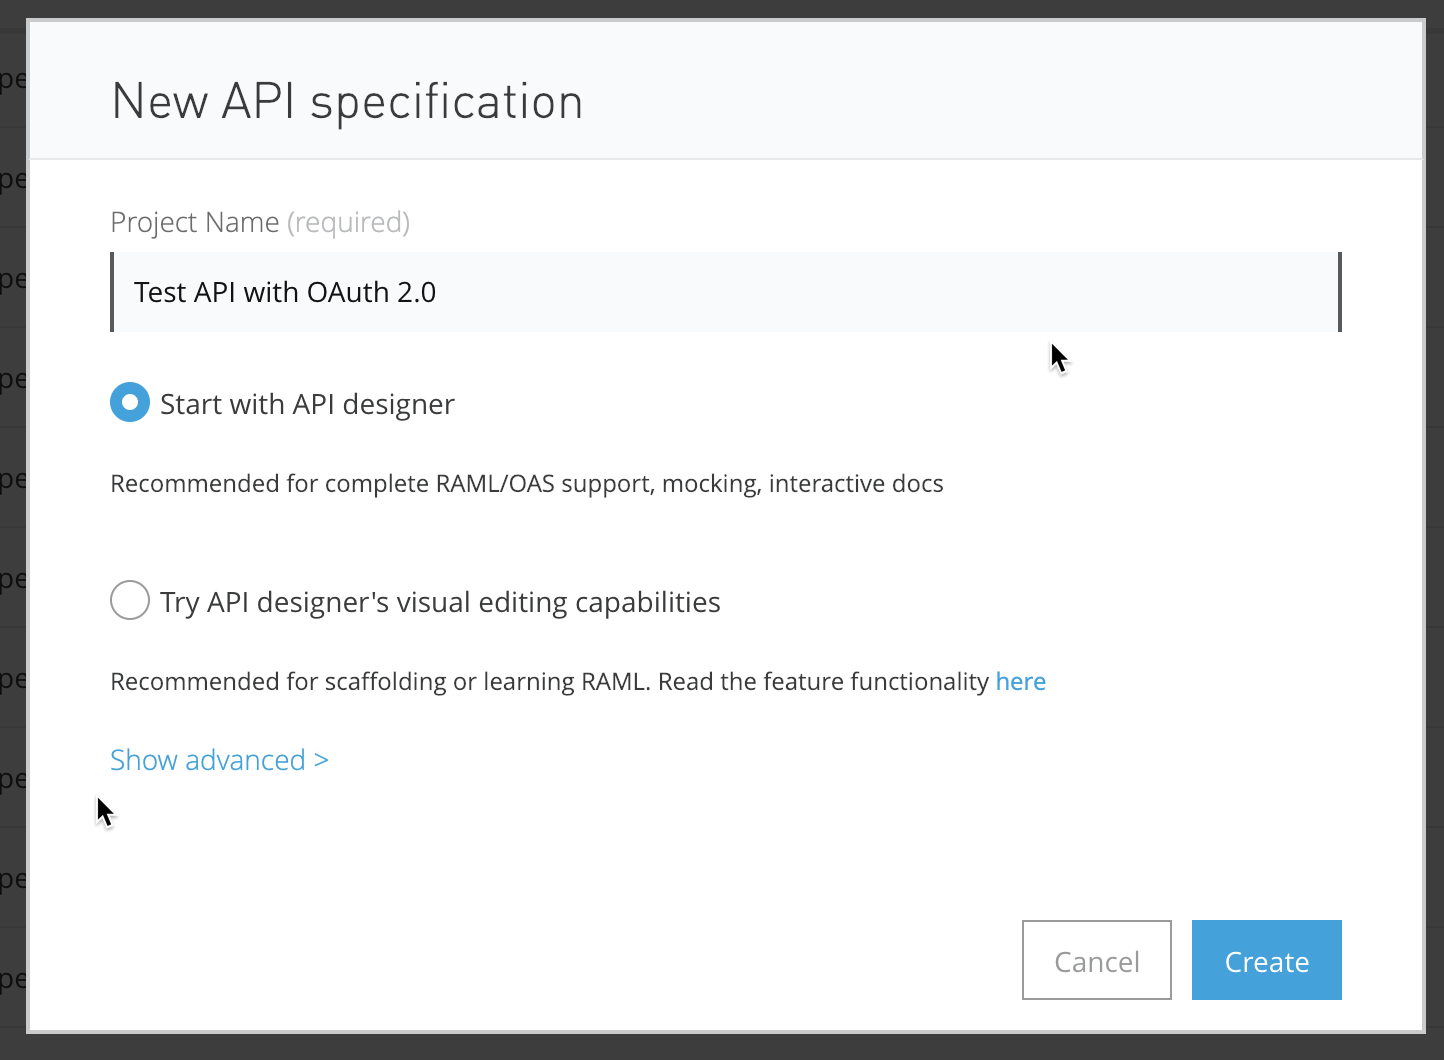
Paste the following RAML into the designer and change the authorizationUri and accessTokenUri to point to the OAuth 2.0 provider that we just deployed. If you want to apply this to an existing API, just copy and paste the securitySchemes: section into your API. Additionally for each method you want to apply this to, paste the following: securedBy: [oauth_2_0] after the method.
#%RAML 1.0
version: v1
title: Test API with OAuth 2.0
baseUri: http://localhost:8081/api

documentation:
  - title: Test API with OAuth 2.0
    content: API used to test against OAuth 2.0 provider.
securitySchemes:
  oauth_2_0:
    description: |
      This API supports OAuth 2.0 for authenticating all API requests.
    type: OAuth 2.0
    describedBy:
      headers:
        Authorization:
          description: |
             Used to send a valid OAuth 2 access token. Do not use with the "access_token" query
             string parameter.
          type: string
      queryParameters:
        access_token:
          description: |
             Used to send a valid OAuth 2 access token. Do not use together with the "Authorization"
             header
          type: string
      responses:
        401:
          description: |
            Bad or expired token. This can happen if the user or the API revoked or expired an
            access token. To fix, you should re-authenticate the user.
        403:
          description: |
            Bad OAuth request (wrong consumer key, bad nonce, expired timestamp...). Unfortunately,
            re-authenticating the user won't help here.
    settings:
      authorizationUri: https://oauth2-provider-dj.us-e1.cloudhub.io/authorize
      accessTokenUri: https://oauth2-provider-dj.us-e1.cloudhub.io/token
      authorizationGrants: [ authorization_code,client_credentials ]
types:
  user:
    description: User datatype
    type: object
    properties:
      id:
        required: false
        type: string
      firstName:
        required: false
        type: string
      lastName:
        required: true
        example: Last name example
        type: string
      email:
        required: false
        example: email@example.com
        type: string
  users:
    description: List of users
    type: array
    items:
      type: user
/users:
  description: Get Users
  displayName: Users
  get:
    securedBy: [oauth_2_0]
    responses:
      400:
      200:
        body:
          application/json:
            type: users
            example:
              [{
                "id":"1",
                "firstName":"Joe",
                "lastName":"Smith",
                "email":"joe.smith@test.com"
              }]
Note: Changing the authorizationUri and the accessTokenUri in the RAML is an important step. Without these configurations, the OAuth policy won't know where to redirect the user to get a token.
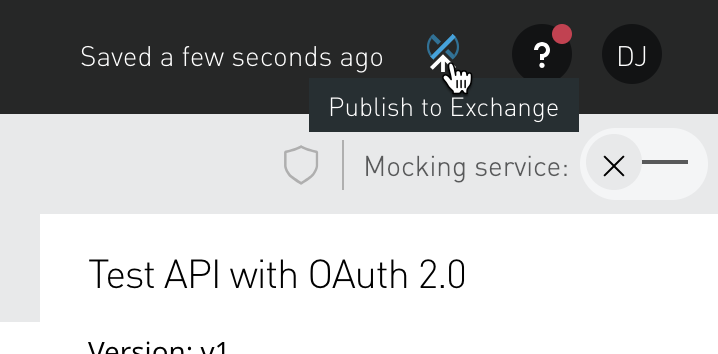
Click on Publish to Exchange in the top right.
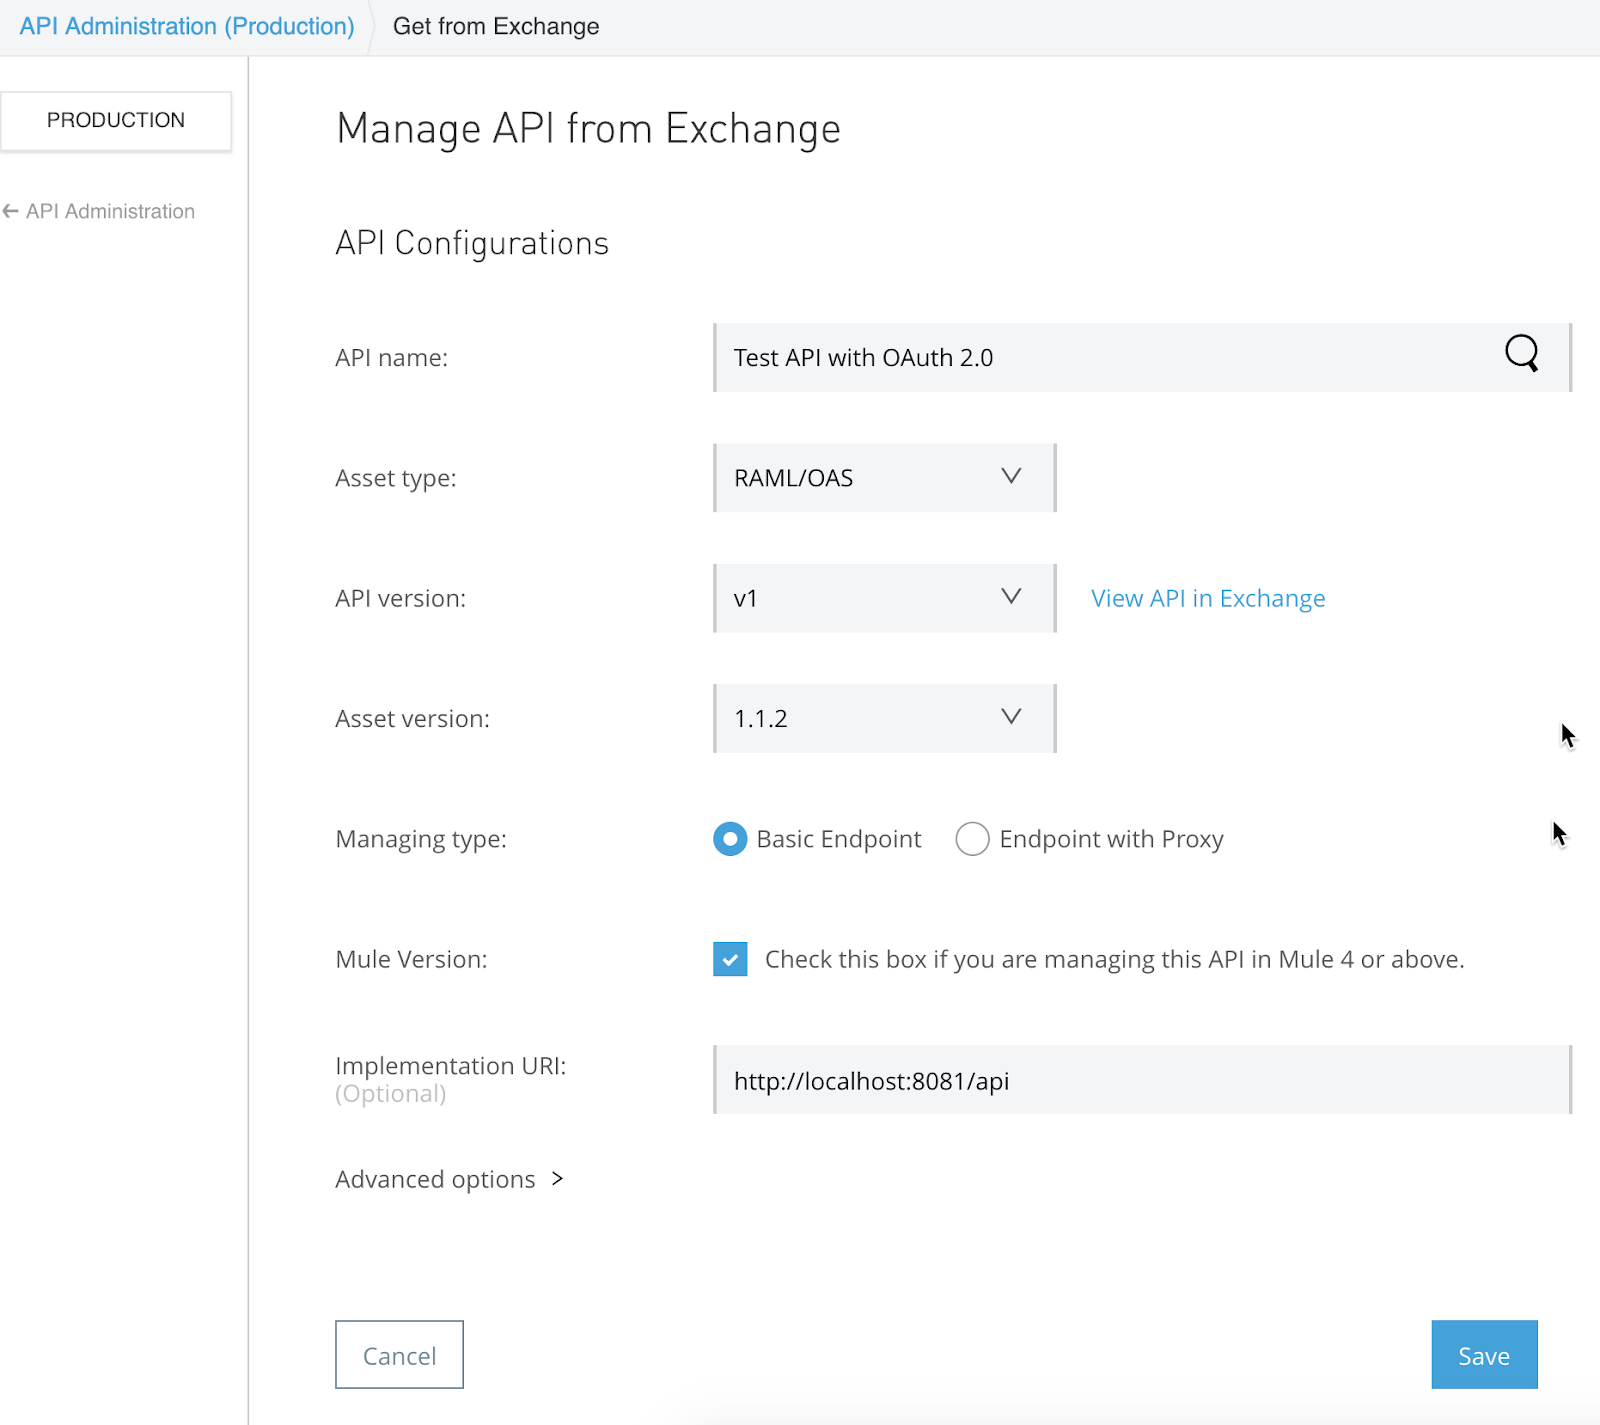
Switch to API Manager and click on Manage API and select Manage API from Exchange
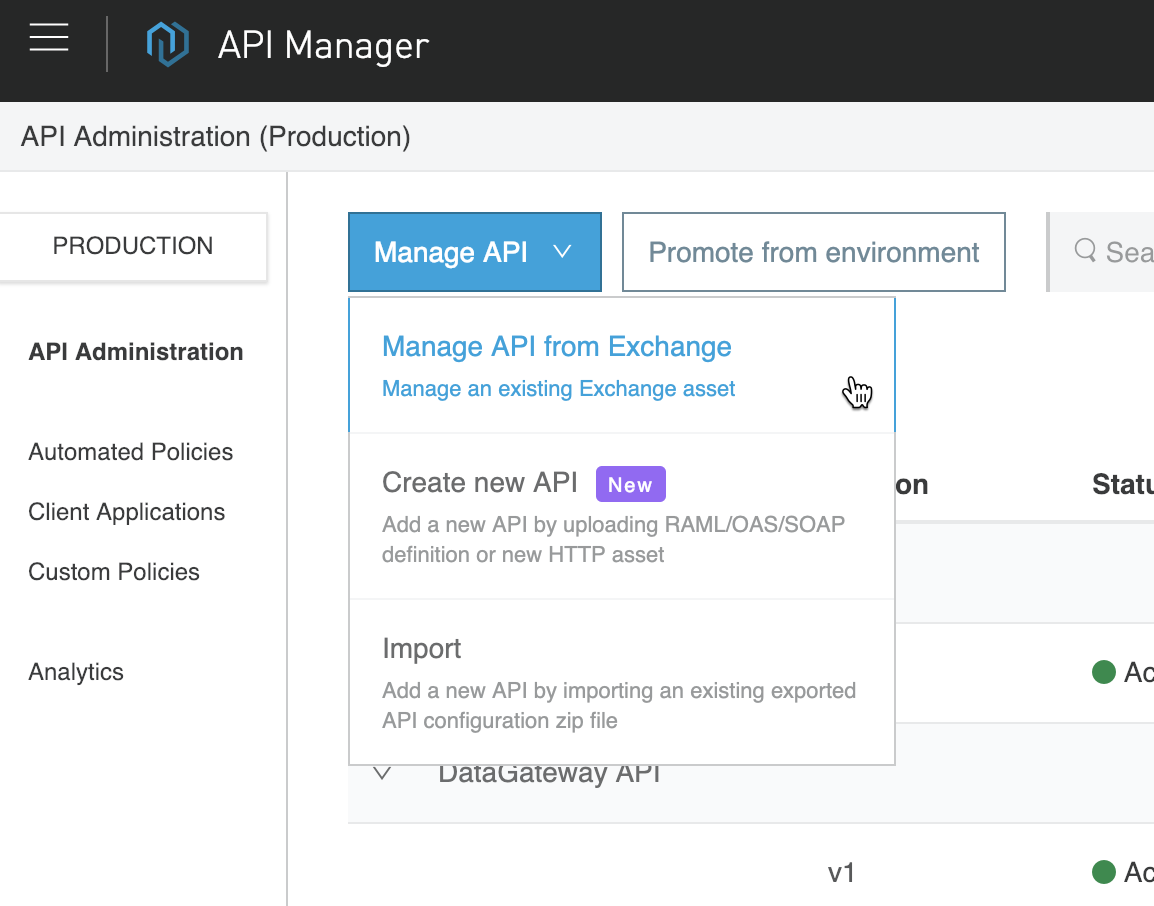
Search for and select the API that we created (e.g. Test API with OAuth 2.0) to auto-populate the API Name field. Check the box for Mule Version to use Mule 4 and keep the remaining fields with their defaults values and then click on Save.
Back on the Settings page for the API, take note of the API ID under Autodiscovery. We'll need this later when we set up the implementation in Studio.

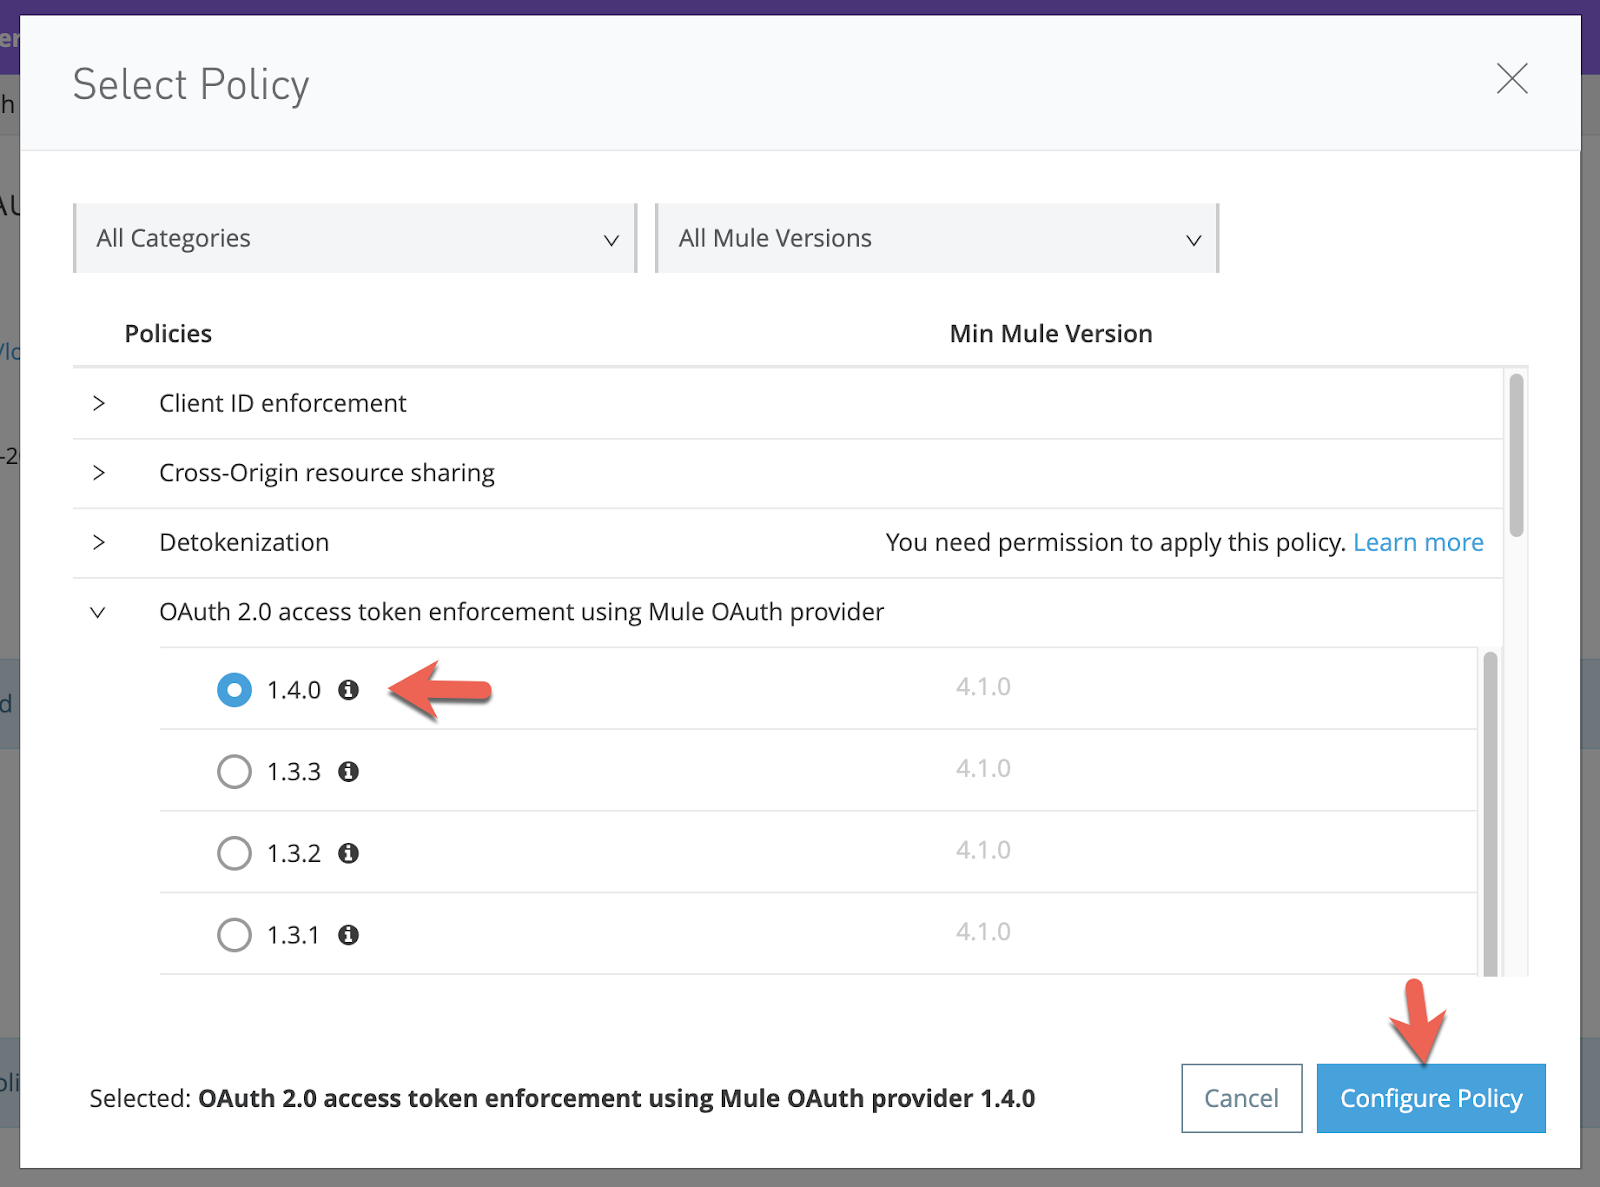
The next step is to walk you through the process of applying the OAuth policy to the API that you just setup in API Manager. On the left hand navigation, click on Policies on the left-hand navigation and then click on Apply New Policy

Expand and click on the latest policy for the OAuth 2.0 access token enforcement using Mule OAuth provider policy and click on Configure Policy
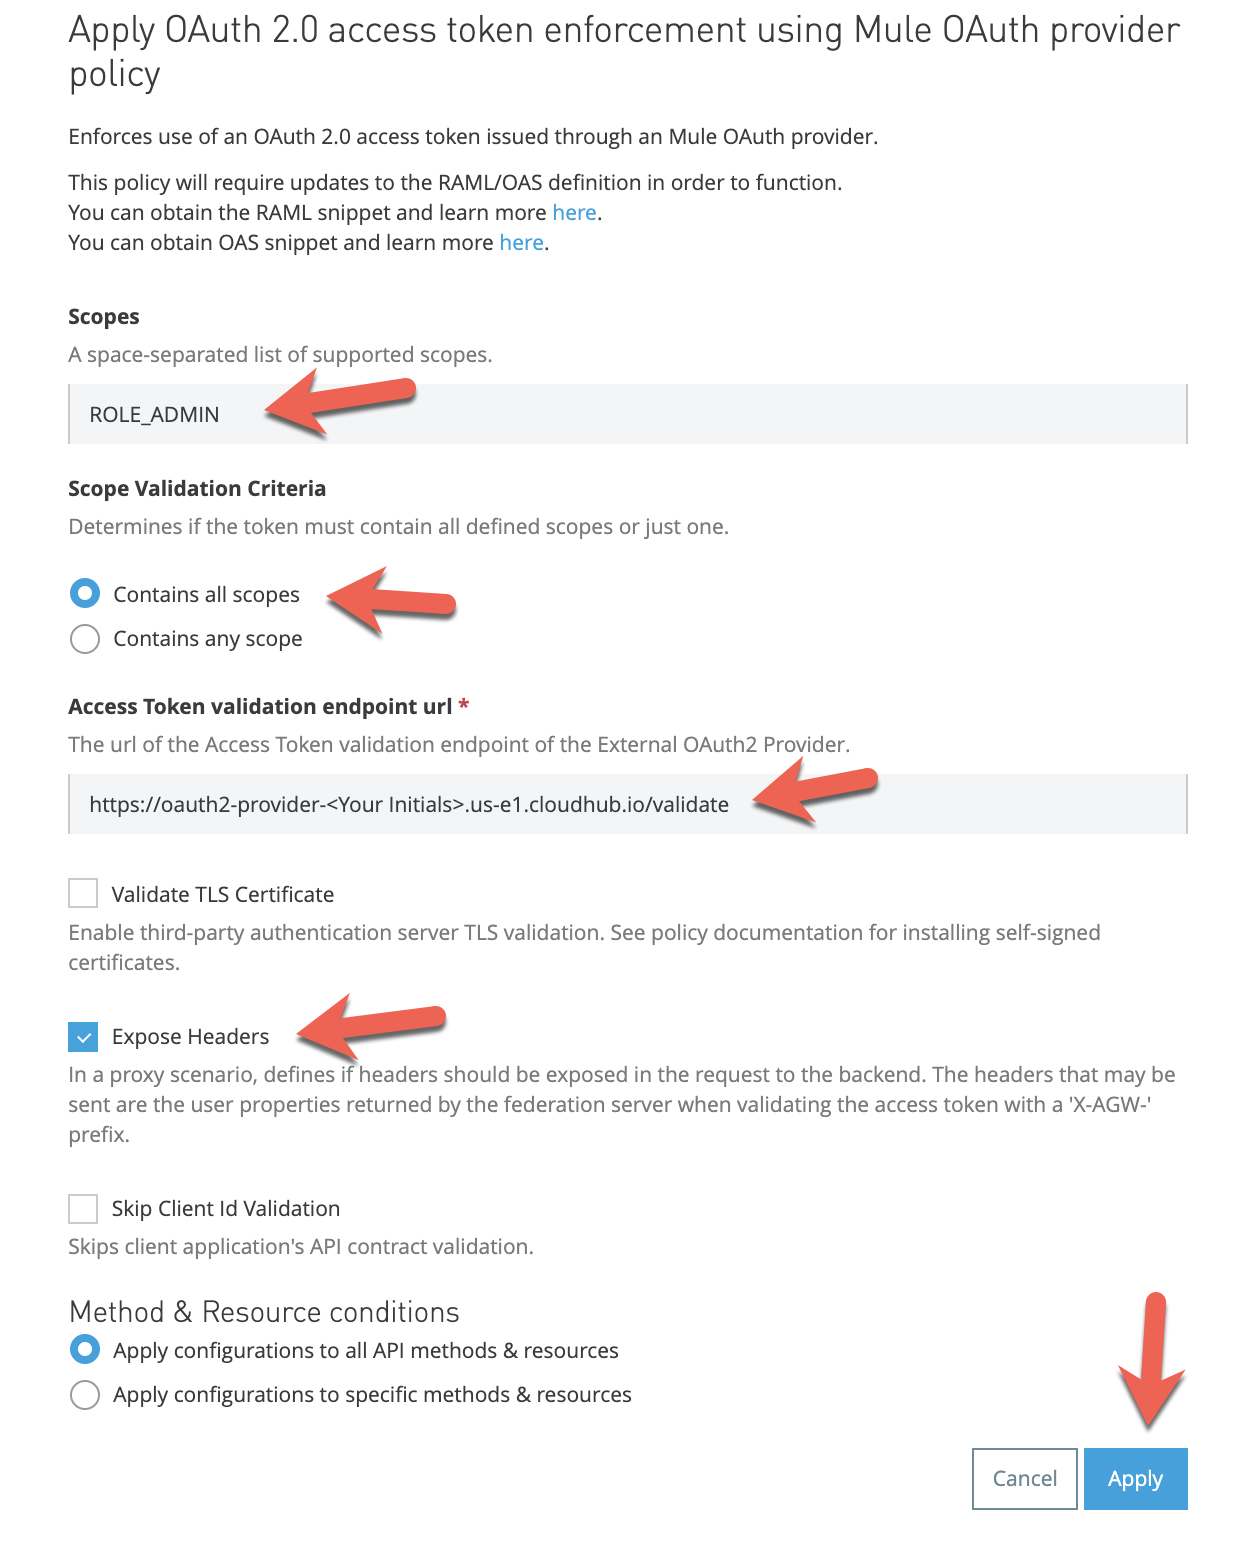
In the pop-up window, enter the following for the corresponding fields and then click on Apply
Scopes - Case Sensitive |
|
Access Token validation endpoint url |
|
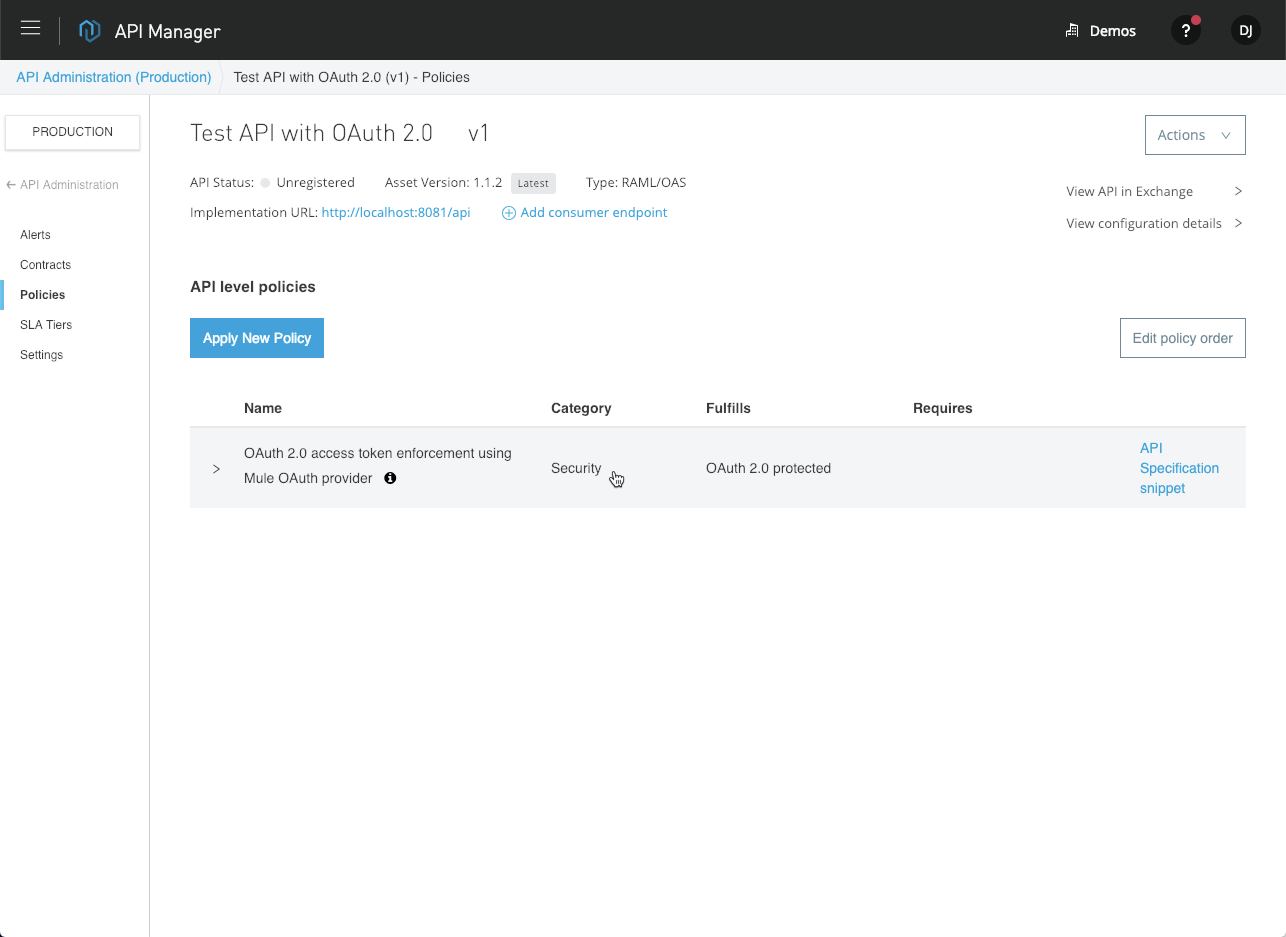
The Policies screen should look like the following after the policy is applied successfully.
We're going to take the API we designed with RAML and create a new API application in Anypoint Studio. We'll add the API Auto Discovery component and deploy the API application to CloudHub. Once deployed, this API will be protected by the policy we applied and leverage the OAuth 2.0 Provider.
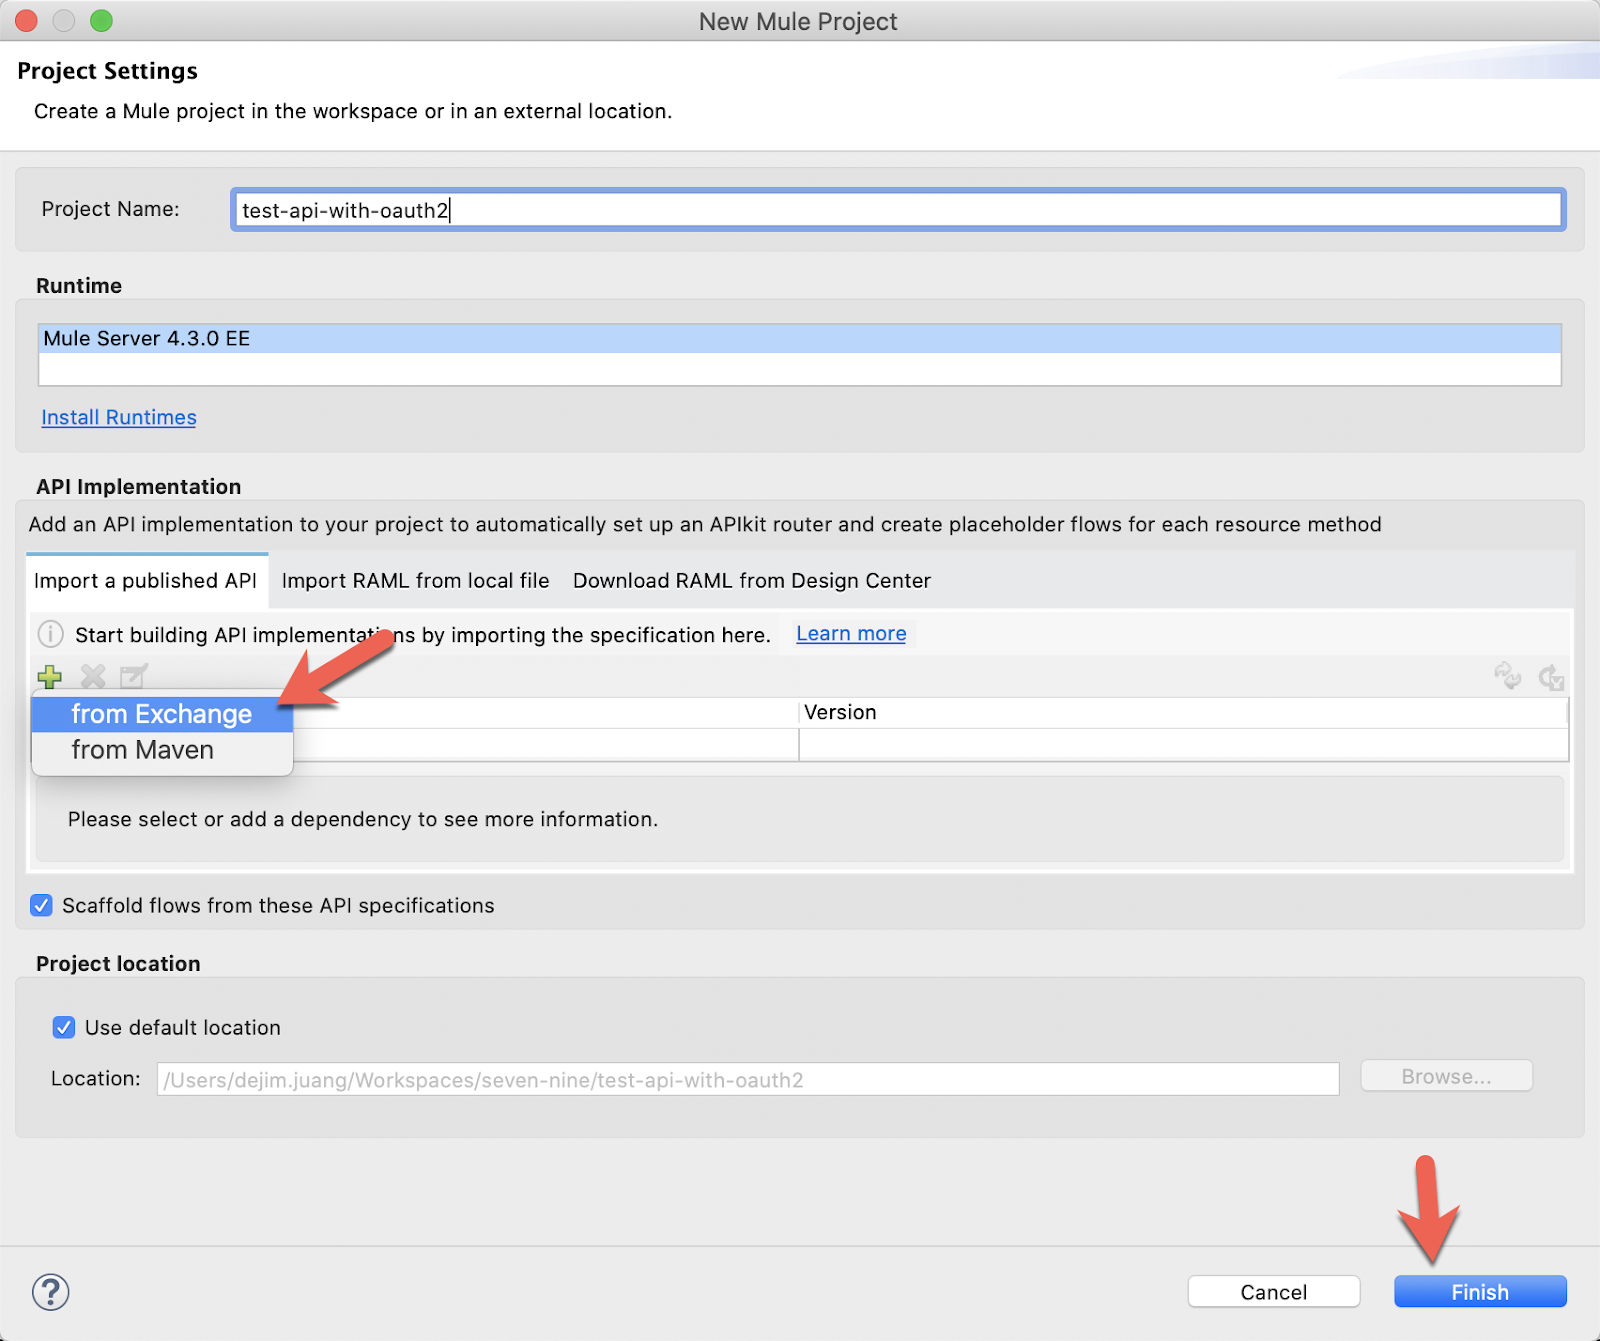
In Anypoint Studio, click on File > New > Mule Project

Give the project a name under Project Name: with your initials (e.g. test-api-with-oauth2-dj).
Adding your initials will reduce the need to change the name of the app during deployment because CloudHub doesn't allow for duplicate app names. Next, click the green plus sign under API Implementation in the Import a published API tab to add the RAML and select from Exchange
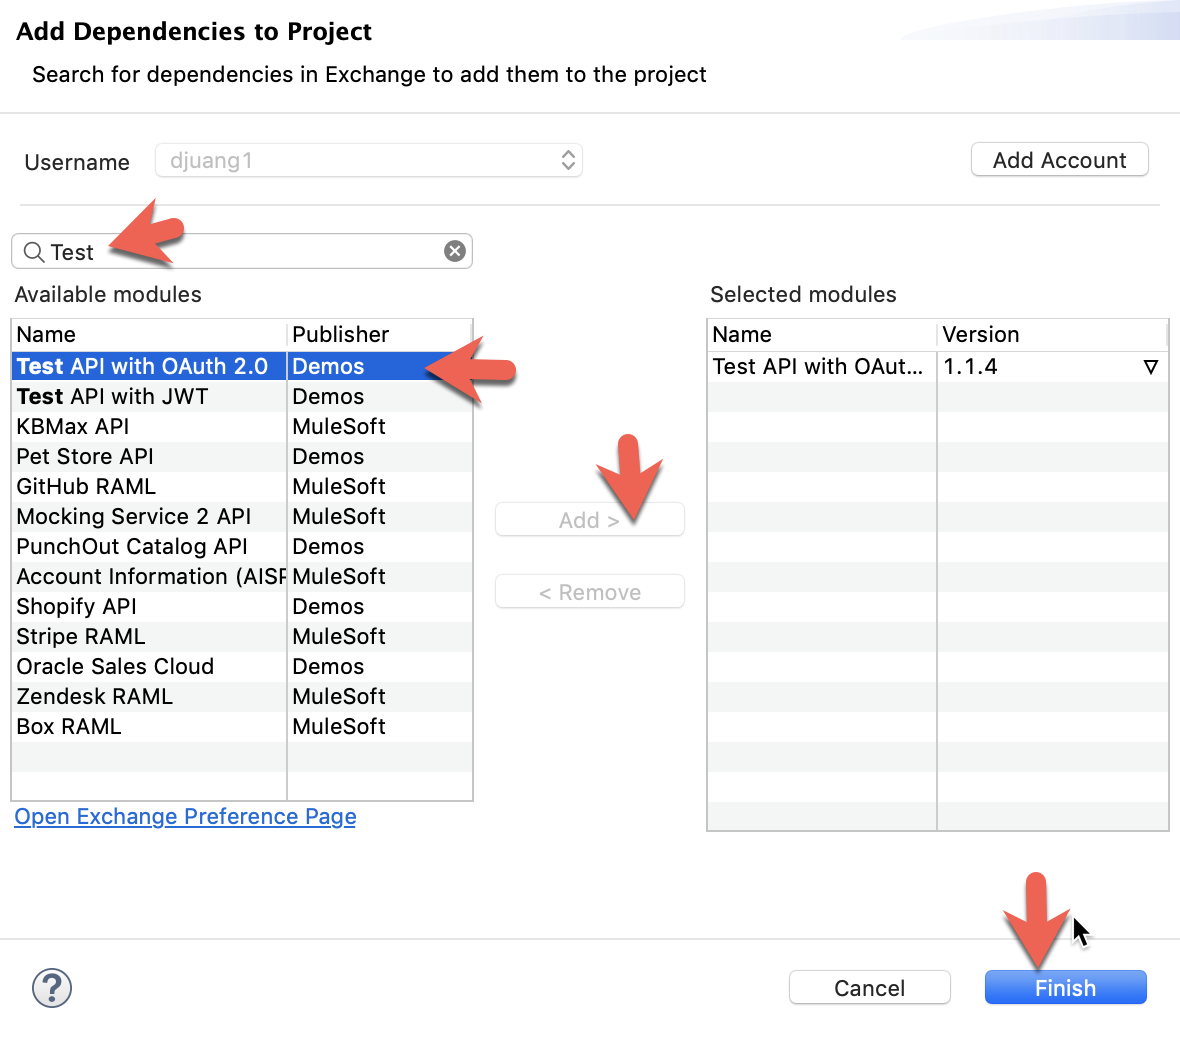
Search for the API we created in Design Center or the API that you are going to apply the OAuth 2.0 policy against. Once you find it, select if from Available modules and click on Add. Click on Finish and then click on Finish in the New Mule Project window
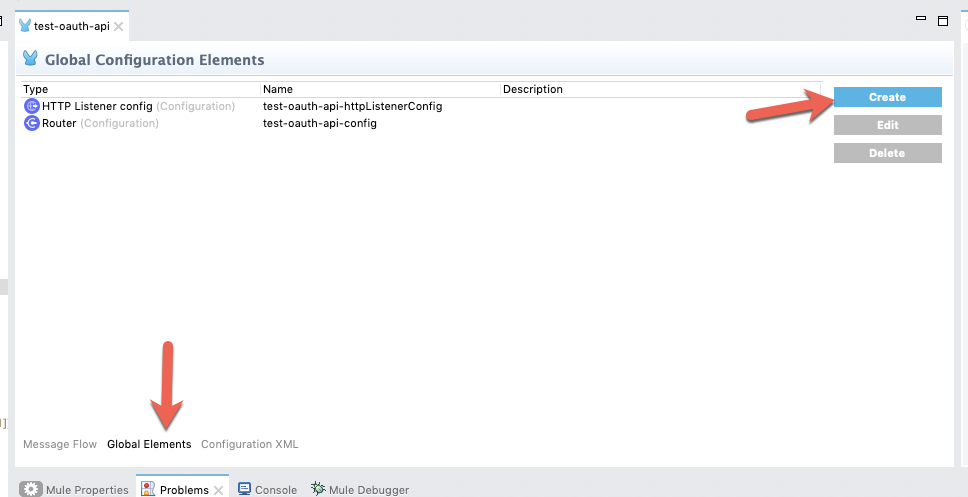
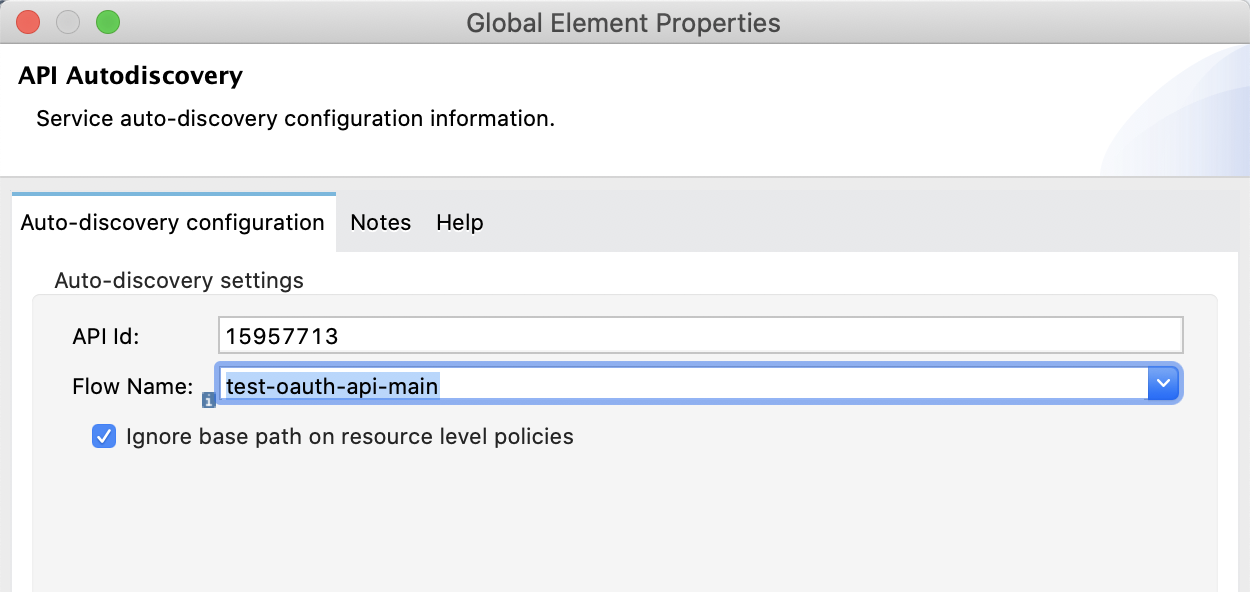
Once the project is generated, click on Global Elements and click on Create
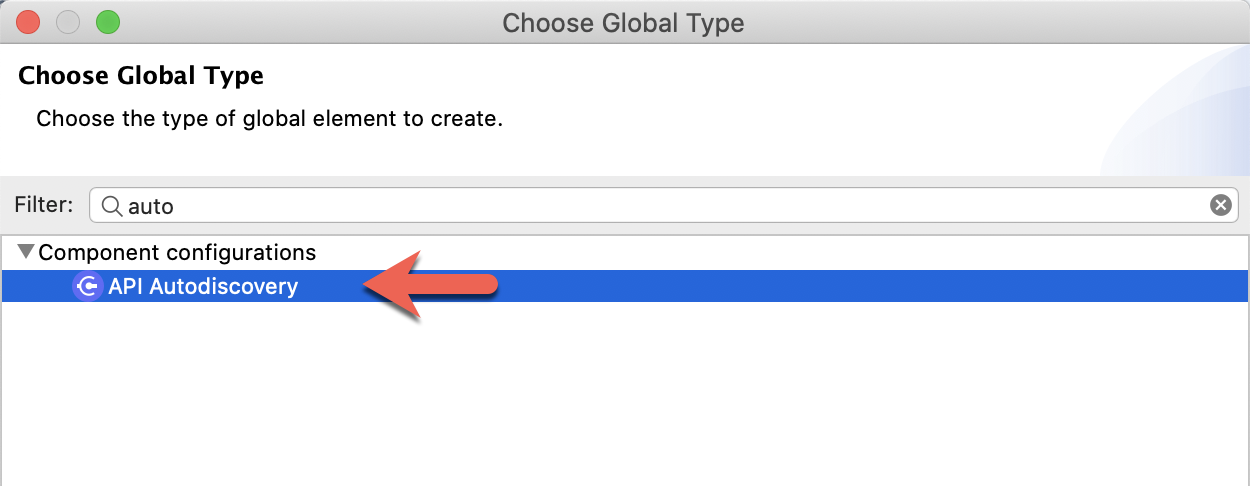
Type in auto and select API Autodiscovery and then click on OK
Fill in the API Id with the ID from the API that we created in API Manager. Select the main flow for the Flow Name field and then click on OK
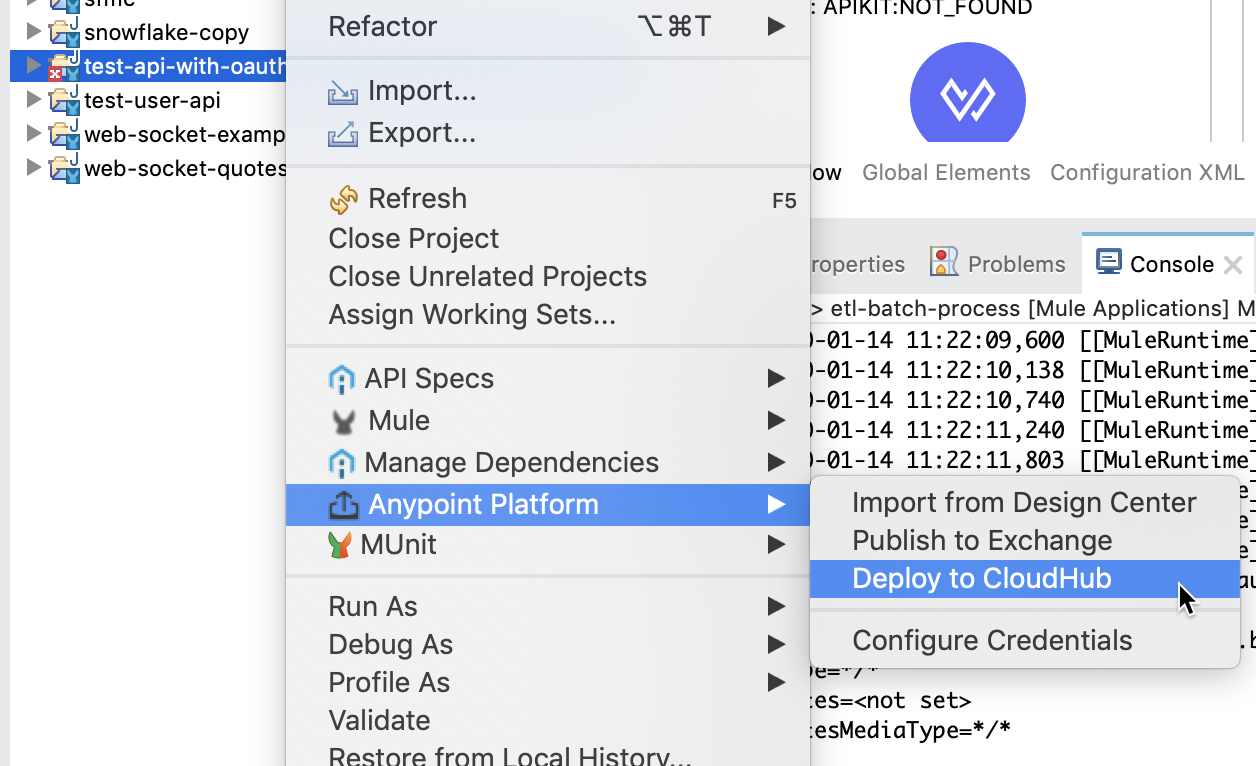
Switch back to the Message Flow and right-click on the project, select Anypoint Platform > Deploy to CloudHub
Add your initials to the application's name (djuang-api-with-oauth2) and keep all the other default values in the popup window and click on Deploy Application
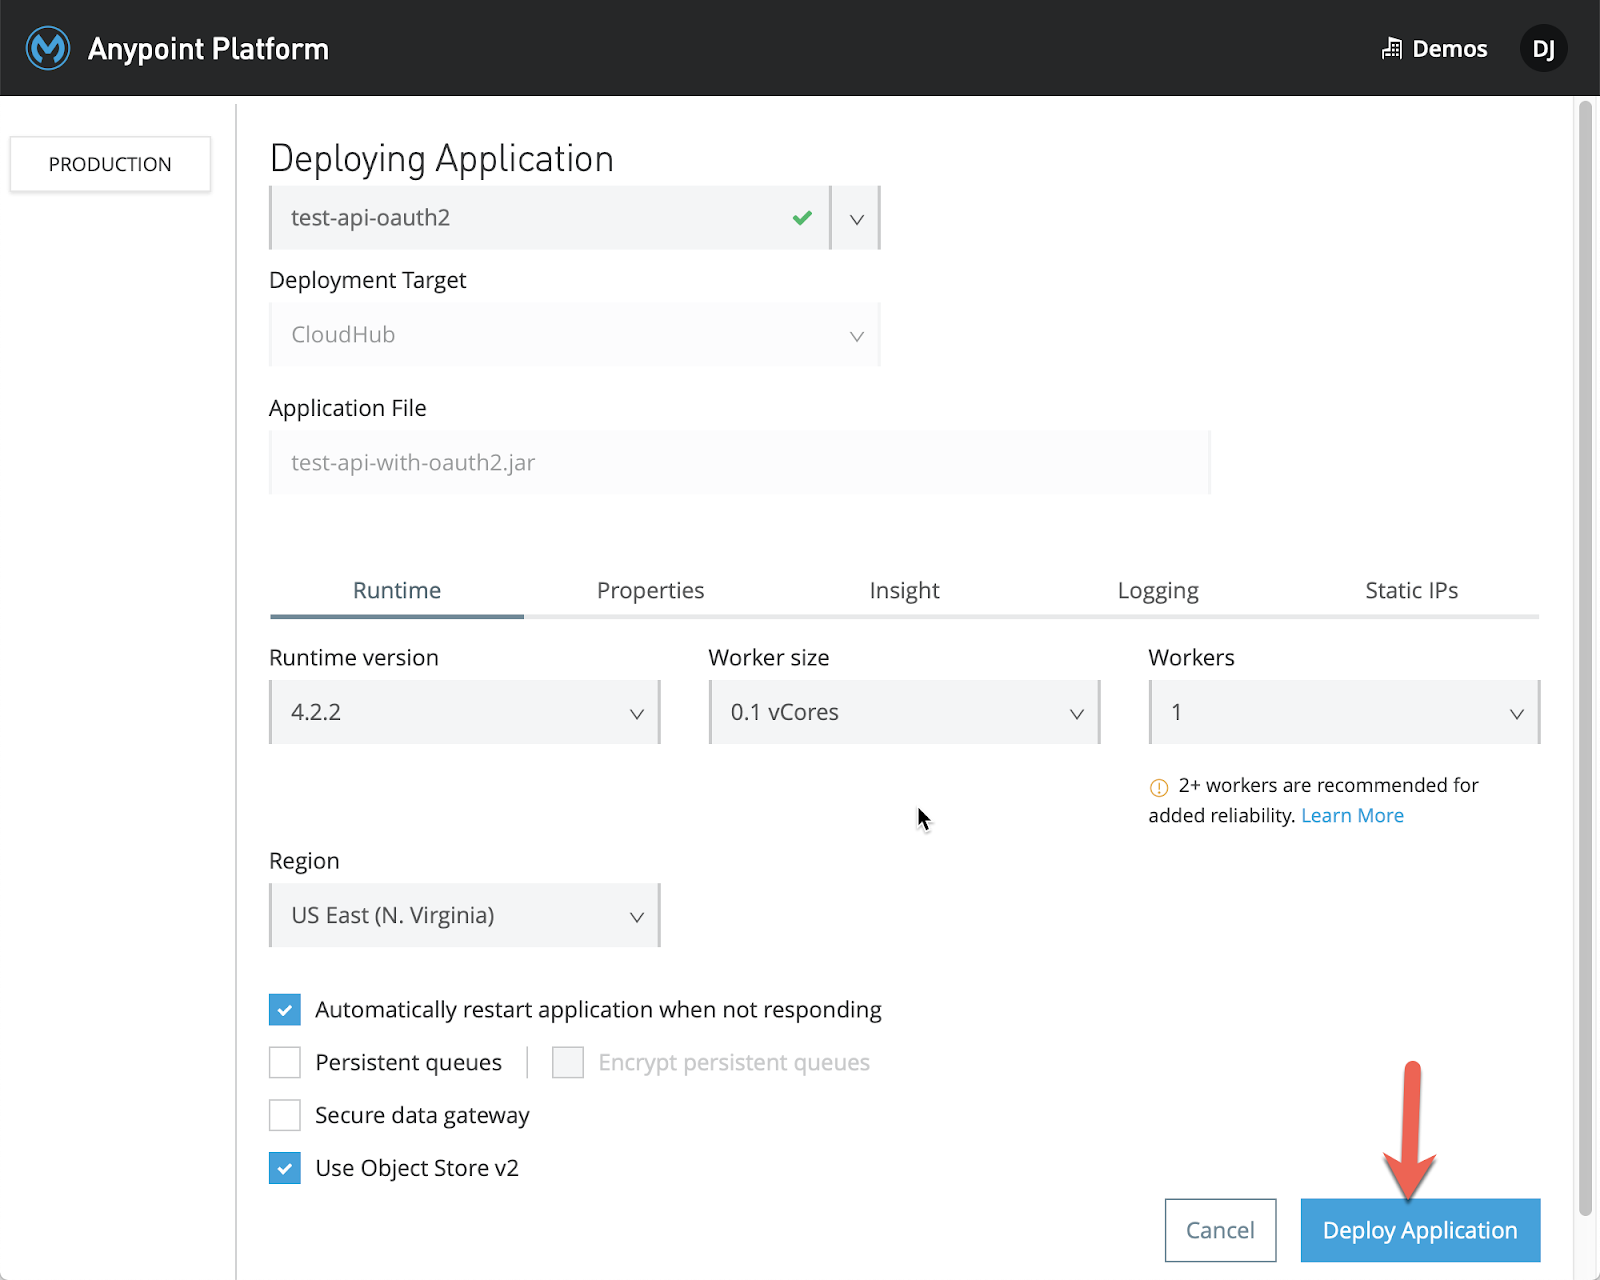
Once the application is deployed, move on to the next step.
To verify the External OAuth provider application and policy are working, we'll use Postman to make a call against the API.
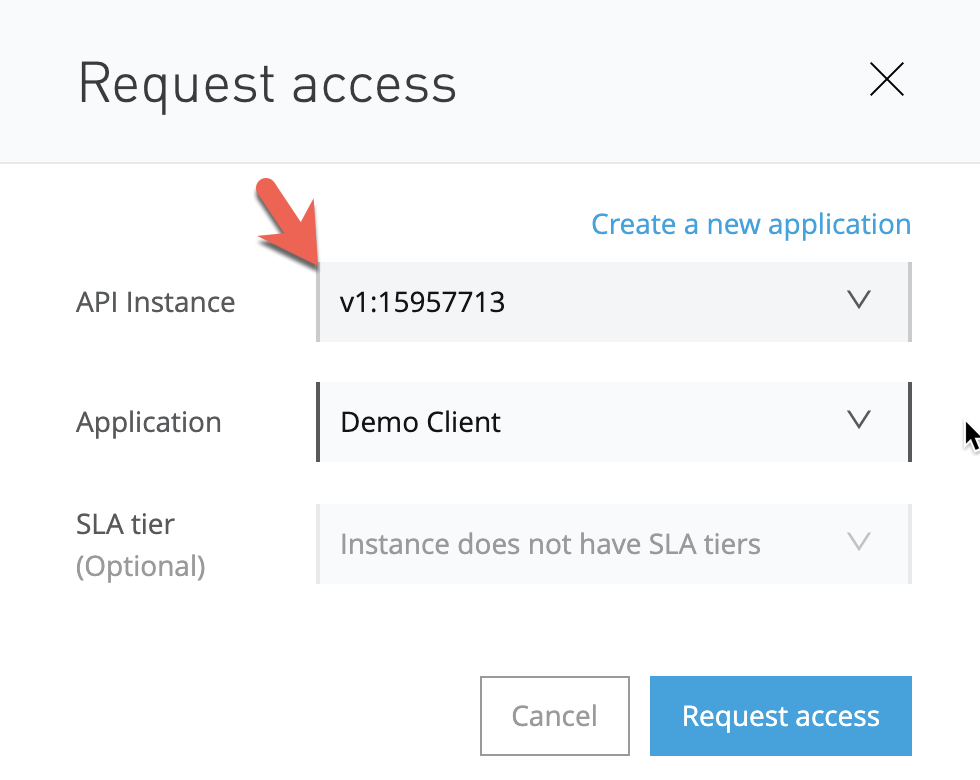
Switch over to Exchange and open the newly published asset. In the top right corner, click on the three dots and click on Request access

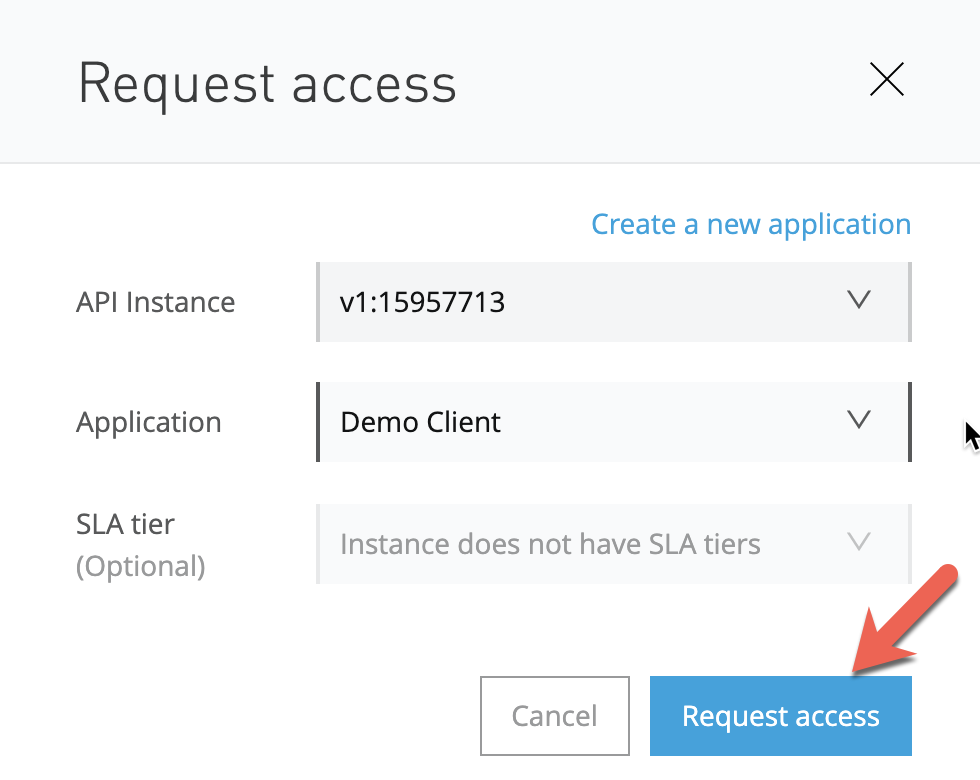
First, select the API that you deployed from the API Instance drop down. If you have an existing application, you can select that from the Application drop down (e.g. Demo Client). Otherwise, click on Create a new application
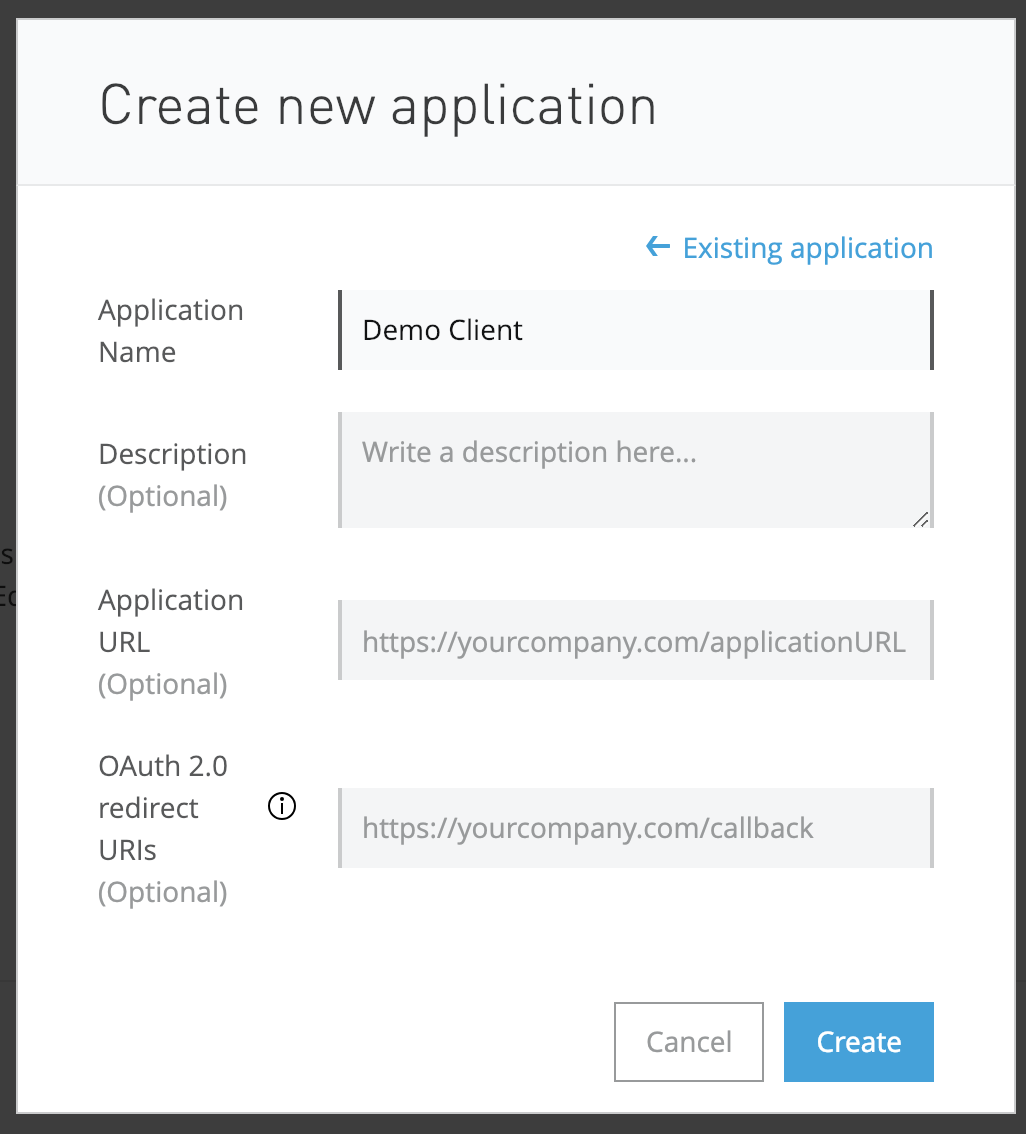
Give the application a name (e.g. Demo Client) and click on Create
Click on Request access
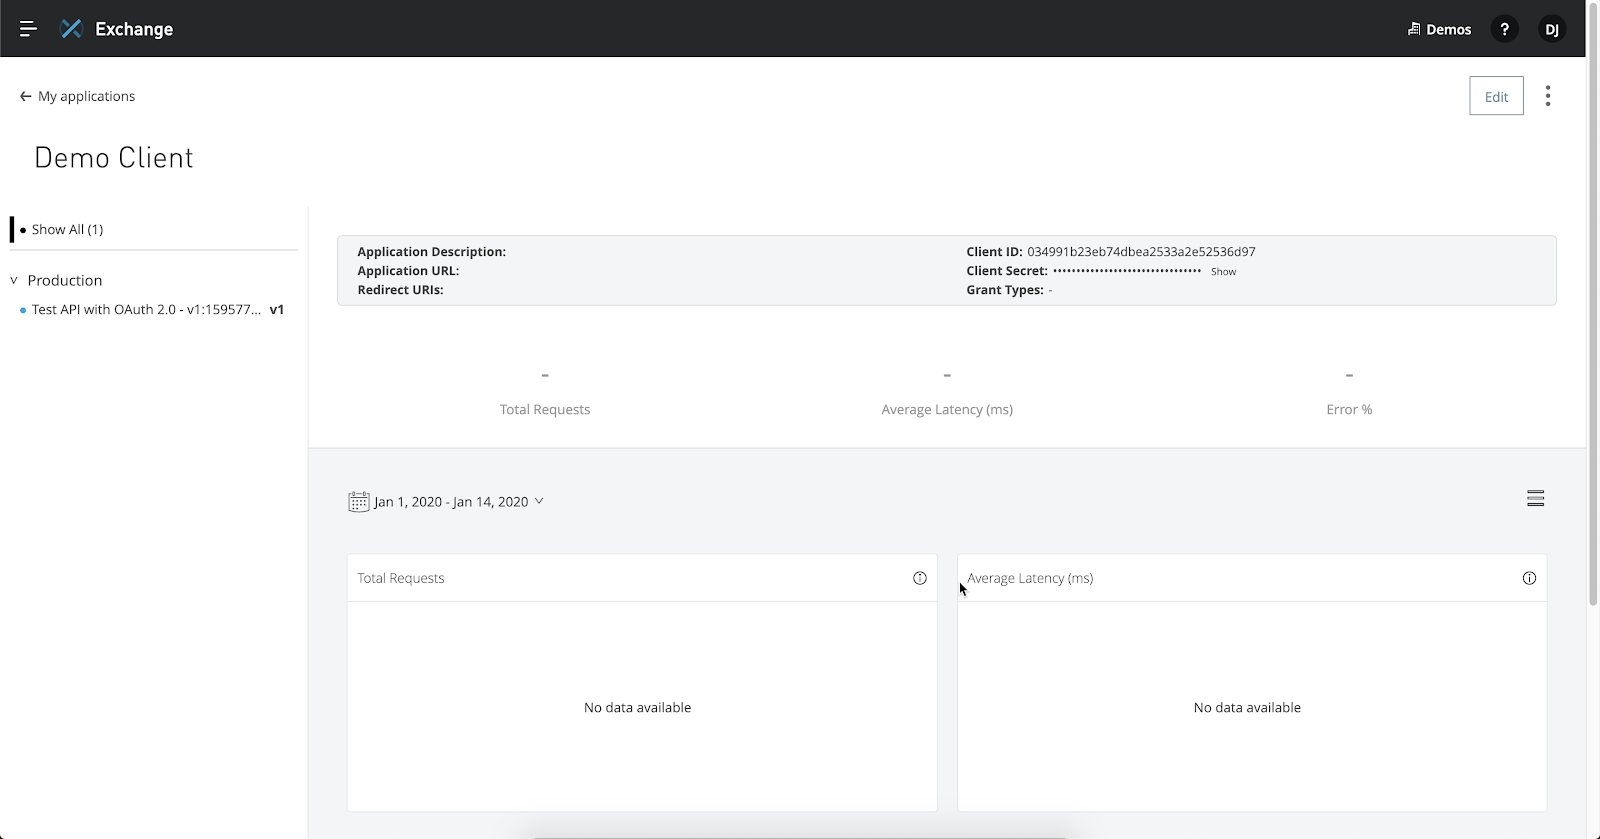
Exchange will open up a new tab with and direct you to the Application details page.
This page provides you a view of all the APIs that have been tied to this application.
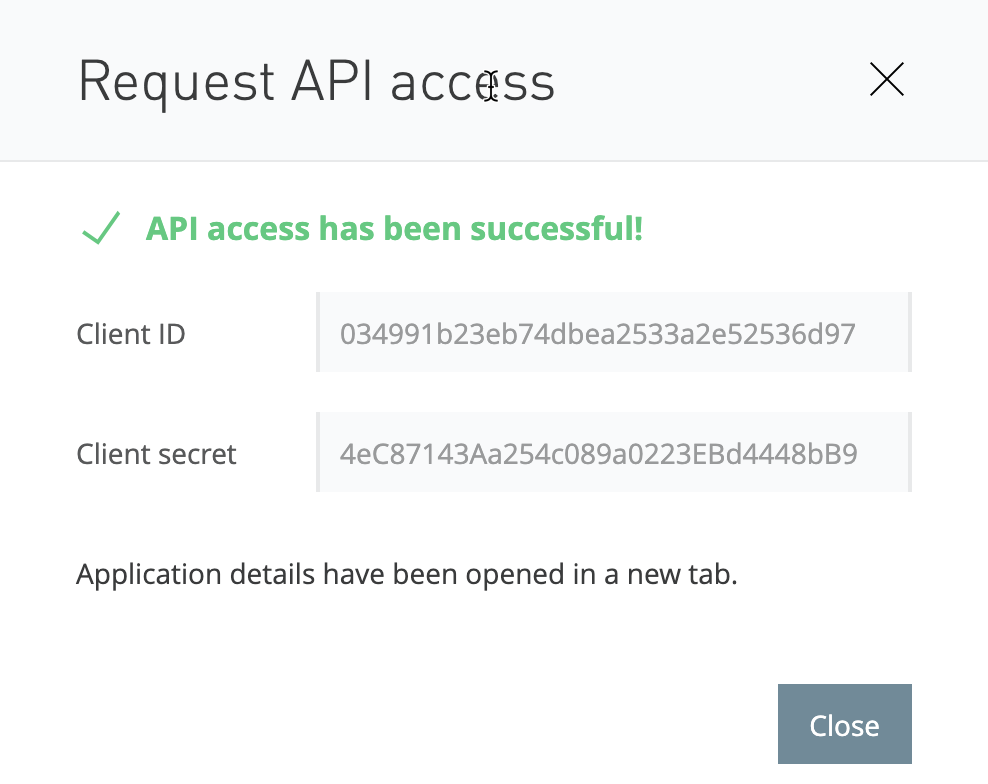
If you switch back to the Exchange tab, copy down the Client ID and Client secret and click on Close.
Before we can use the Client ID, we need to register it with the OAuth Provider we deployed in Step 1. Navigate to the following URL and replace the App URL with your deployment and replace the client_id, client_secret, and name parameters.
https://oauth2-provider-mule4.us-e1.cloudhub.io/register?client_id=f2f055ad0a714b7d9c7dfc2ff76c2431&client_secret=c711e255727840868bC39c5EFA6CD98B&name=Mobile
Now that you've registered the application with the OAuth Provider, switch to Postman. Enter your application URL in the URL field:
http://test-api-oauth2.us-e1.cloudhub.io/api/users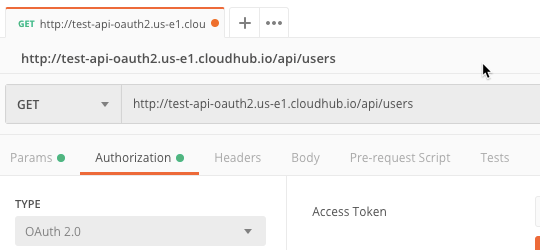
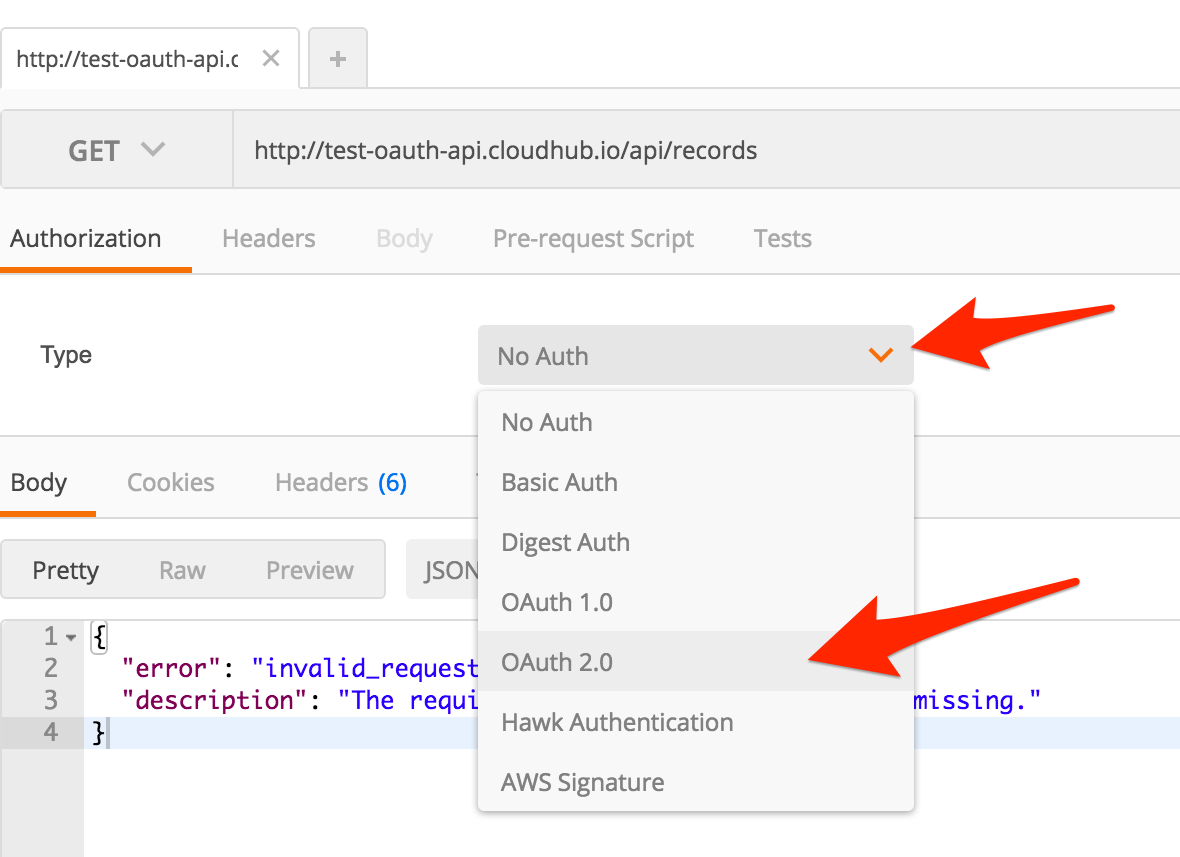
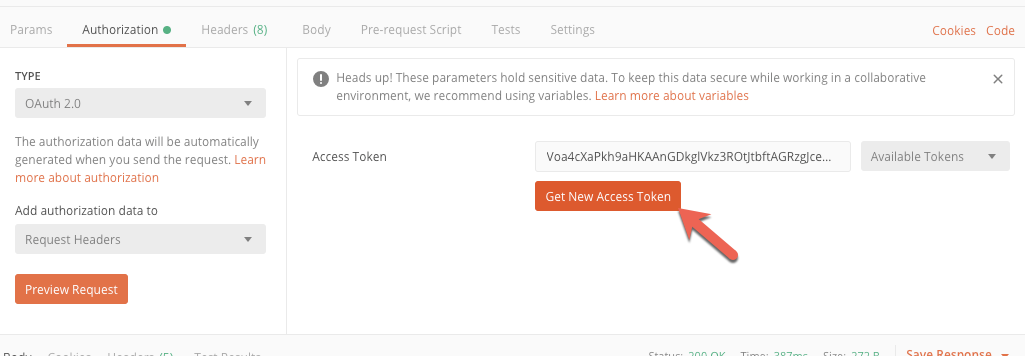
In the Authorization section, select the Type drop-down and select OAuth 2.0
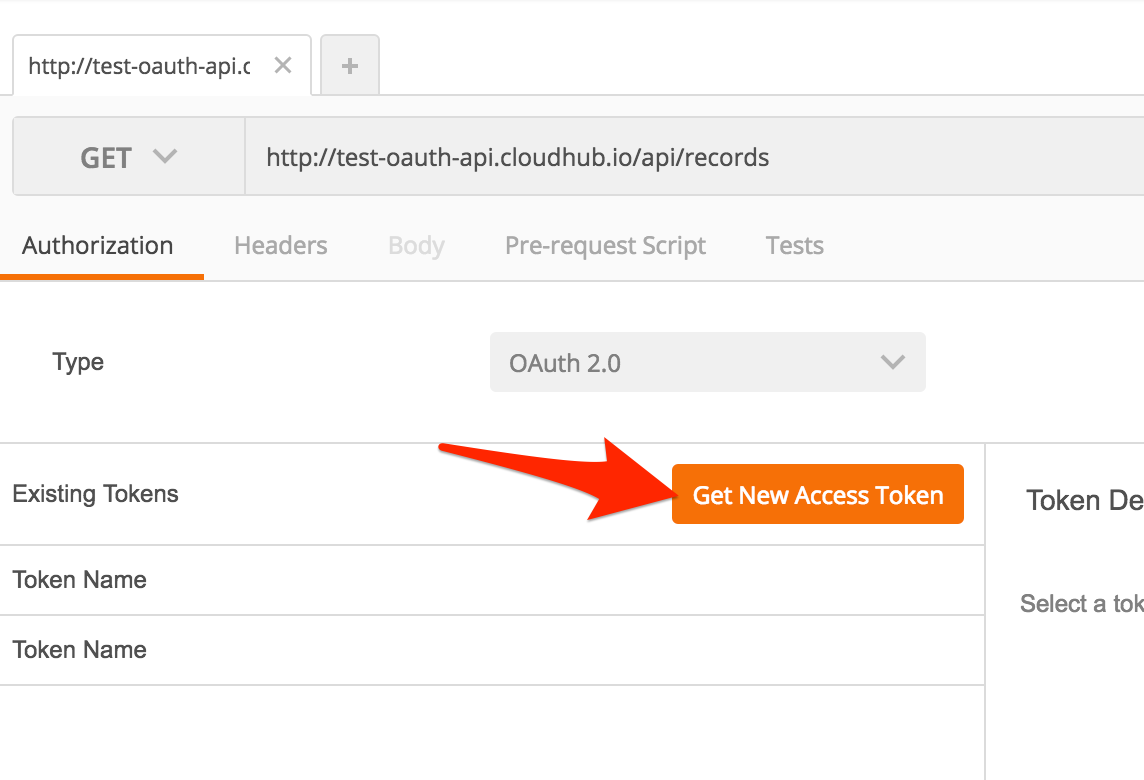
Click on Get New Access Token
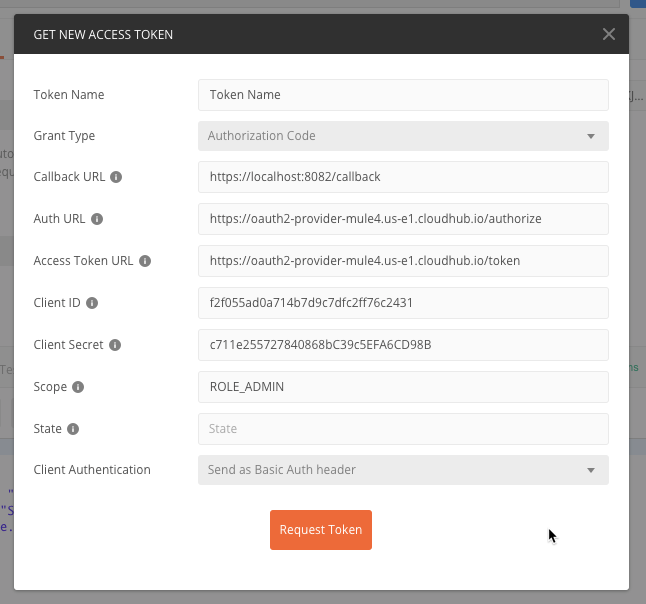
Enter the data for the following fields
Grant Type |
|
Callback URL |
|
Authorization URL |
|
Access Token URL |
|
Client ID |
|
Client Secret |
|
Scope - Case Sensitive |
|
If the OAuth policies have been configured correctly, you should be presented with the authorization screen. The window is generated from the OAuth 2.0 Provider application that was created in Step 1.
Enter the following for the fields:
Username |
|
Password |
|
Click on Login and Authorize
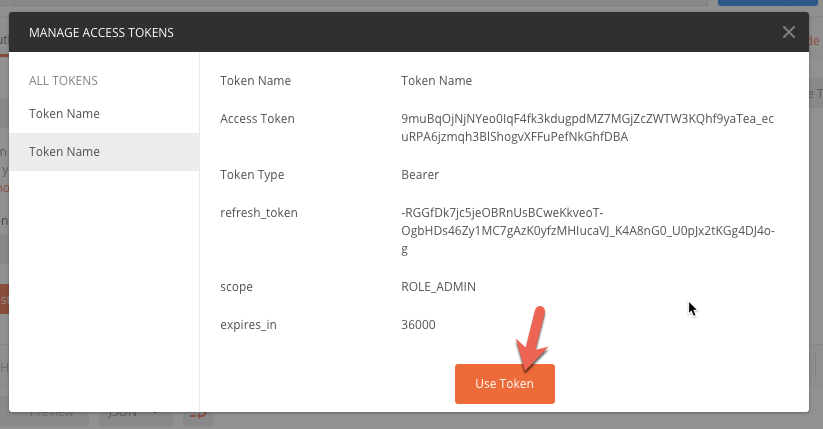
If set up correctly, you'll see a newly generated token. Click on Use Token
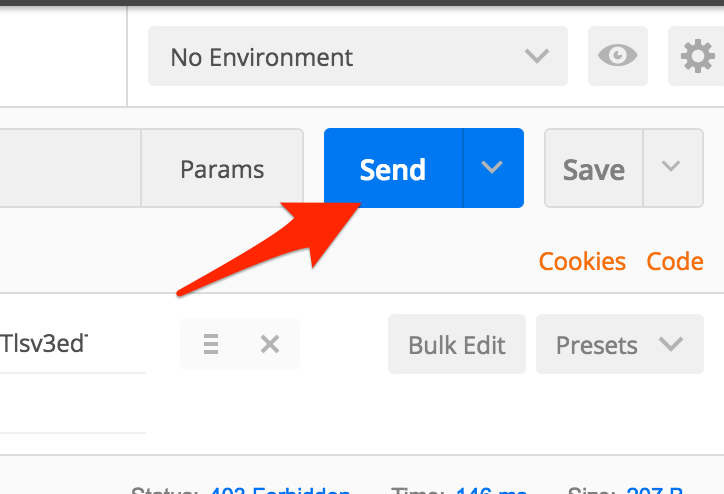
Click on Send on the top-right.
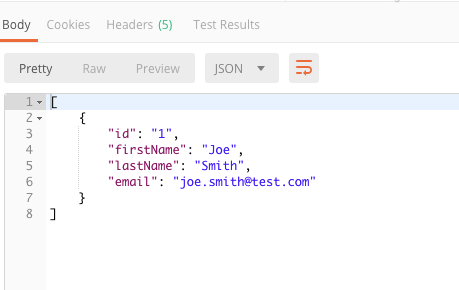
If successful, you should see a status of 200 OK and the data returned from the API.
You can also show authorization using the client credential grant.
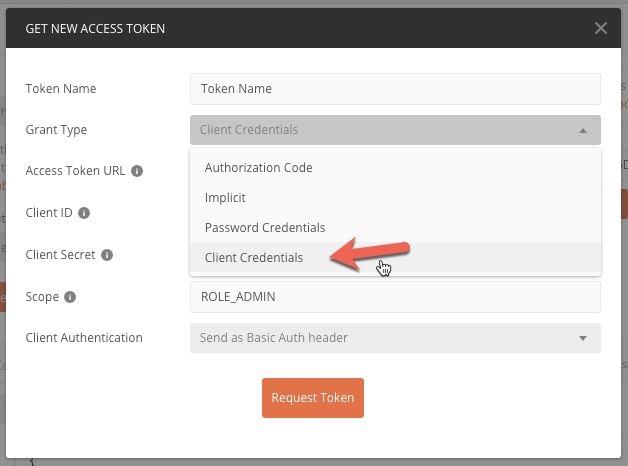
Go back to the Authorization tab and click on Get New Access Token
Change Grant Type to Client Credentials
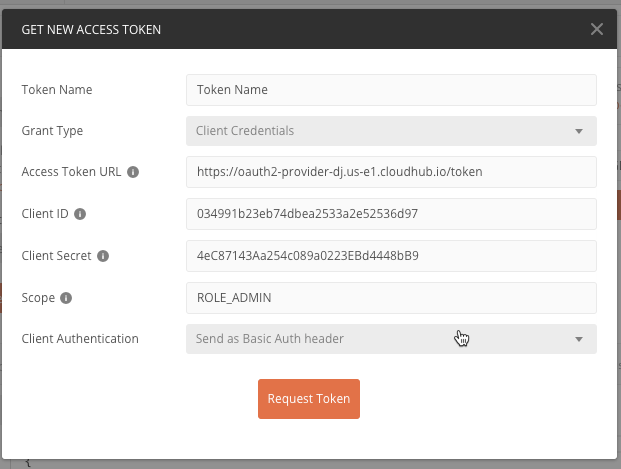
Verify the Access Token URL has the correct path:
e.g. https://oauth2-provider-dj.us-e1.cloudhub.io/token
And click on Request Token
If the call was successful, you'll see the following screen. Click on Use Token
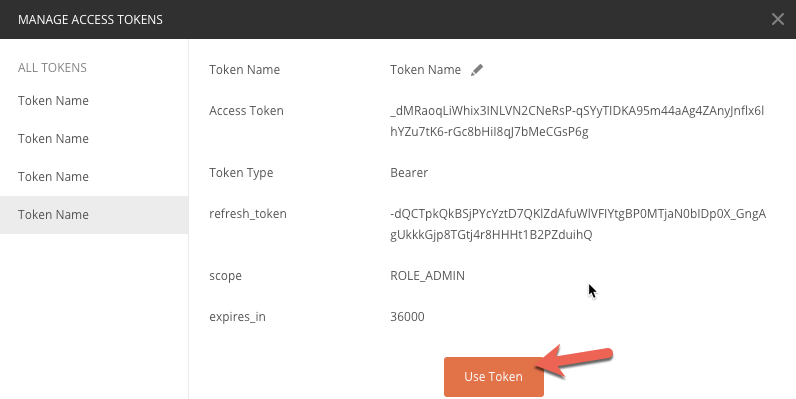
Click on Send on the top-right.
If successful, you should see a status of 200 OK and the data returned from the API.
