The Microsoft SharePoint connector provides support for both SharePoint 2013 and SharePoint Online for use in the cloud and on-premises. This connector enables content and document management, access to intranet and extranet portals and websites, collaboration, and enterprise search.
In this codelab you'll learn how to set up the connector to work with SharePoint Online. We'll be configuring the connector to use OAuth Client Credentials.
Before we configure the SharePoint connector, we need to generate a SSL certificate because we're going to be setting up OAuth Client Credentials to connect to SharePoint.
First, run the following command to create an RSA private key.
openssl genrsa -aes256 -passout pass:mule123 -out server.pass.key 4096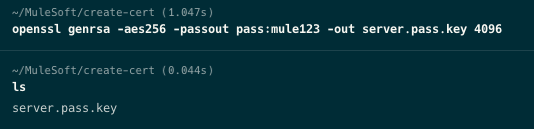
Run the next command to create a private key file server.key in the same working directory.
openssl rsa -passin pass:mule123 -in server.pass.key -out server.key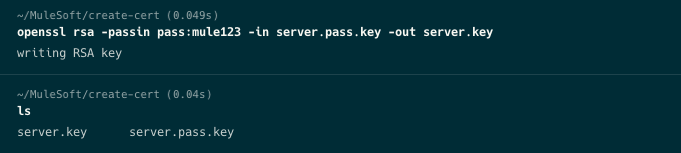
Run the next command in the same directory to create a certificate signing request server.csr
openssl req -new -key server.key -out server.csr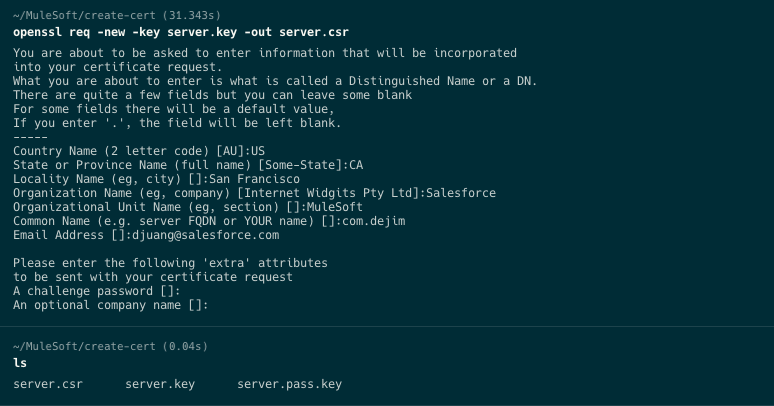
Lastly, to generate a SSL certificate, run the following command. The server.crt is what you'll need to upload to SharePoint in the next step.
openssl x509 -req -sha256 -days 365 -in server.csr -signkey server.key -out server.crt
On the Mule side, we need to create a Java Keystore with the SSL certificate that we just created.
Run the following command in the same directory as the previous step. This will convert the certificate to PKCS12
The -name attribute will be the Keystore alias when you set up the connector later.
openssl pkcs12 -export -in server.crt -inkey server.key -out server.p12 -name mule
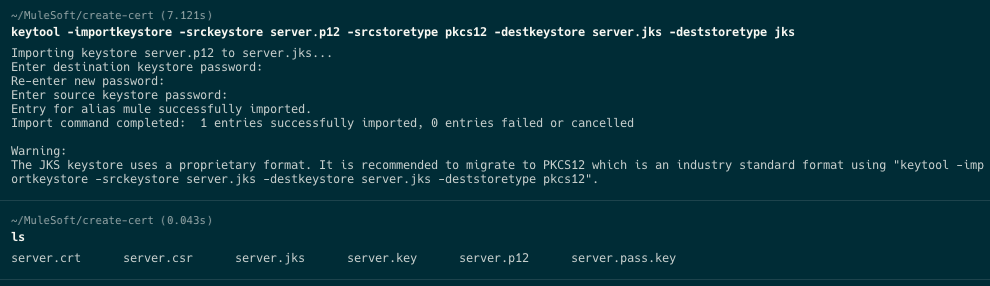
Lastly run the following command to convert the server.p12 file to a Java Keystore file called server.jks
keytool -importkeystore -srckeystore server.p12 -srcstoretype pkcs12 -destkeystore server.jks -deststoretype jksWhen the prompt asks you for a password, be sure to copy that down (e.g. mule123). You'll need that when you configure the Keystore password when you set up the connector later.
Now that we have a SSL Certificate, let's set up an Application in Azure Active Directory (a.k.a as Entra ID) to allow the connector to communicate with SharePoint.
Switch to your browser and navigate to SharePoint. Click on the App Launcher in the top left and click on Admin
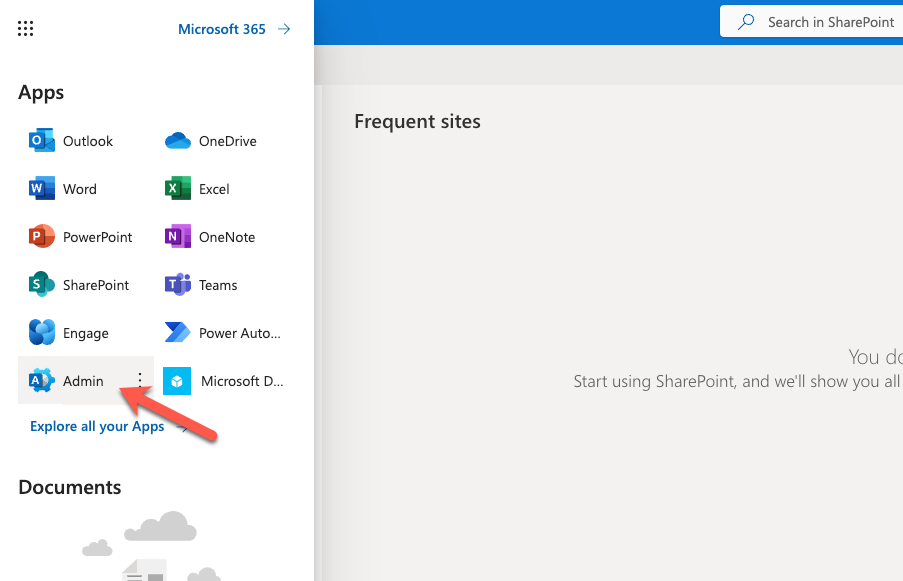
On the left-hand navigation, click on Show all and click on Identity
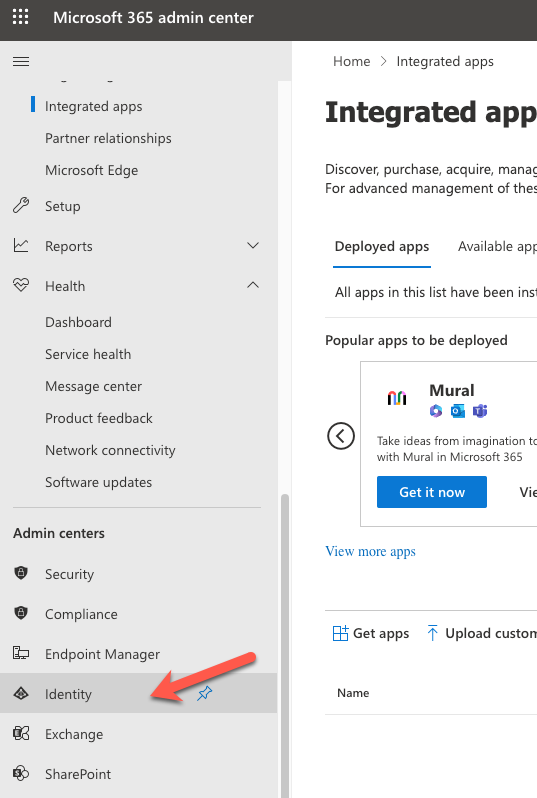
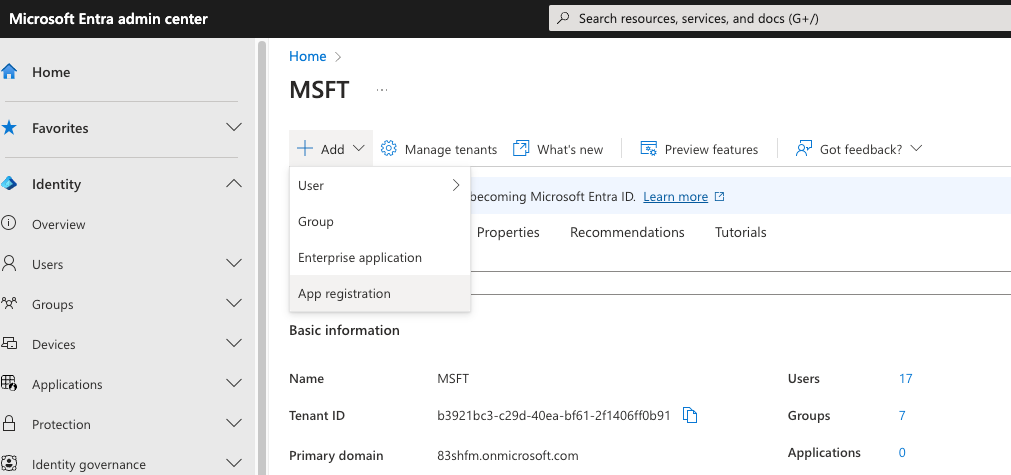
Click on Add and click on App registration
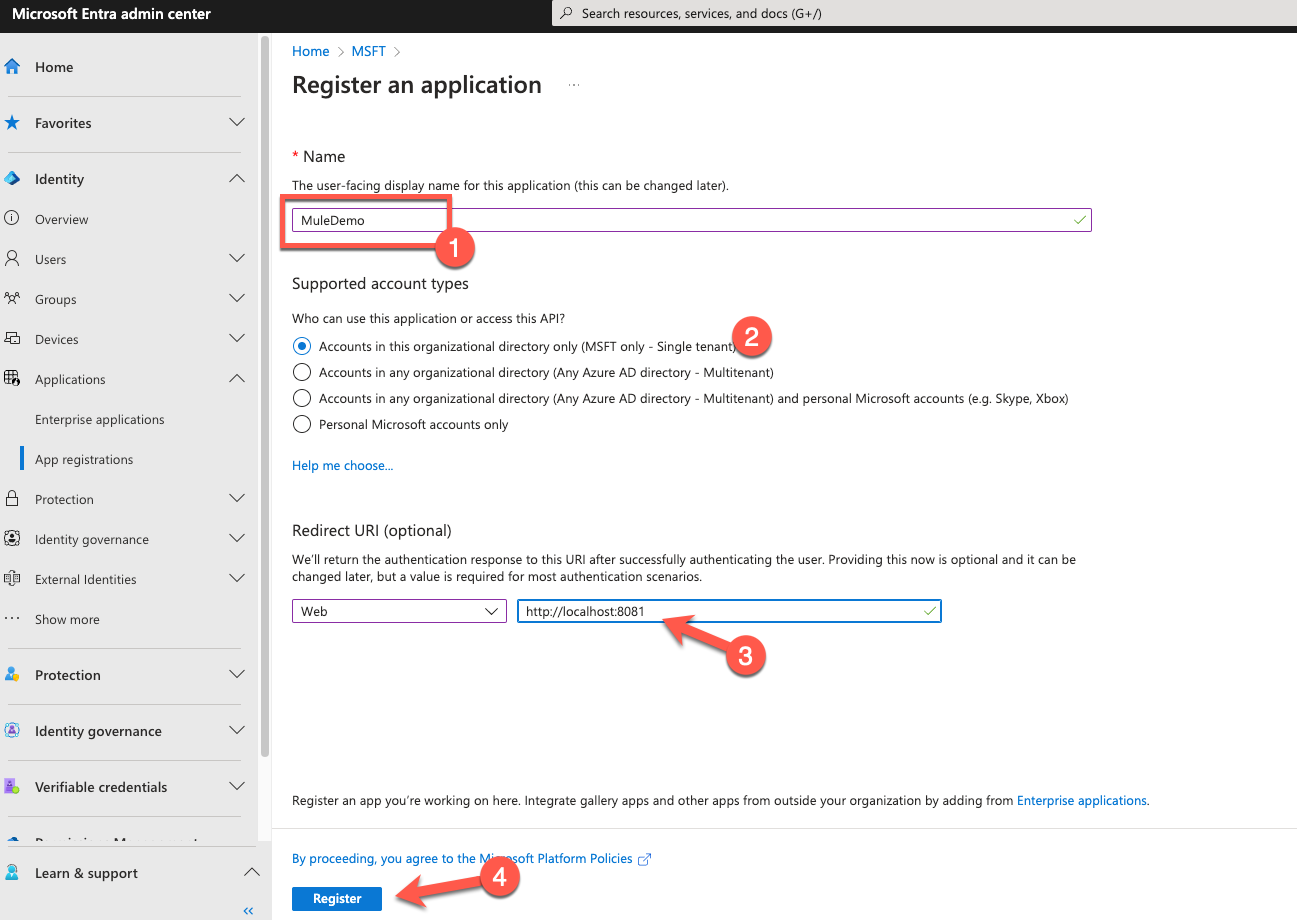
Give the application a name (e.g. MuleDemo). For the Supported account types section, leave the default radio button checked.In the Redirect URI section, select Web from the drop-down and fill in the field with http://localhost:8081. Lastly click on Register
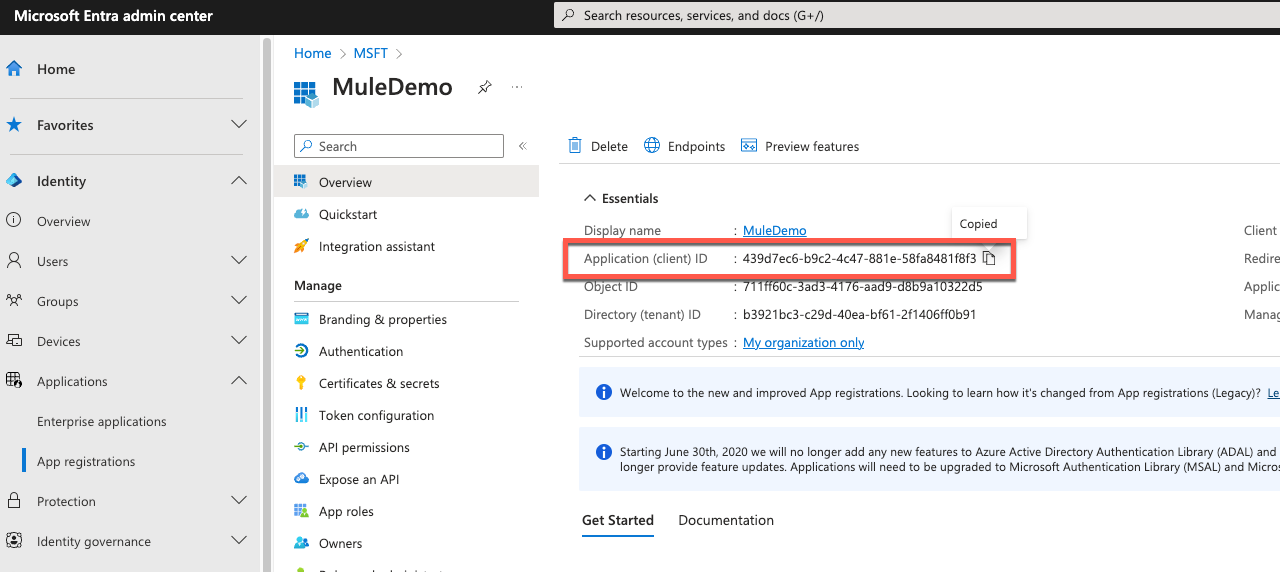
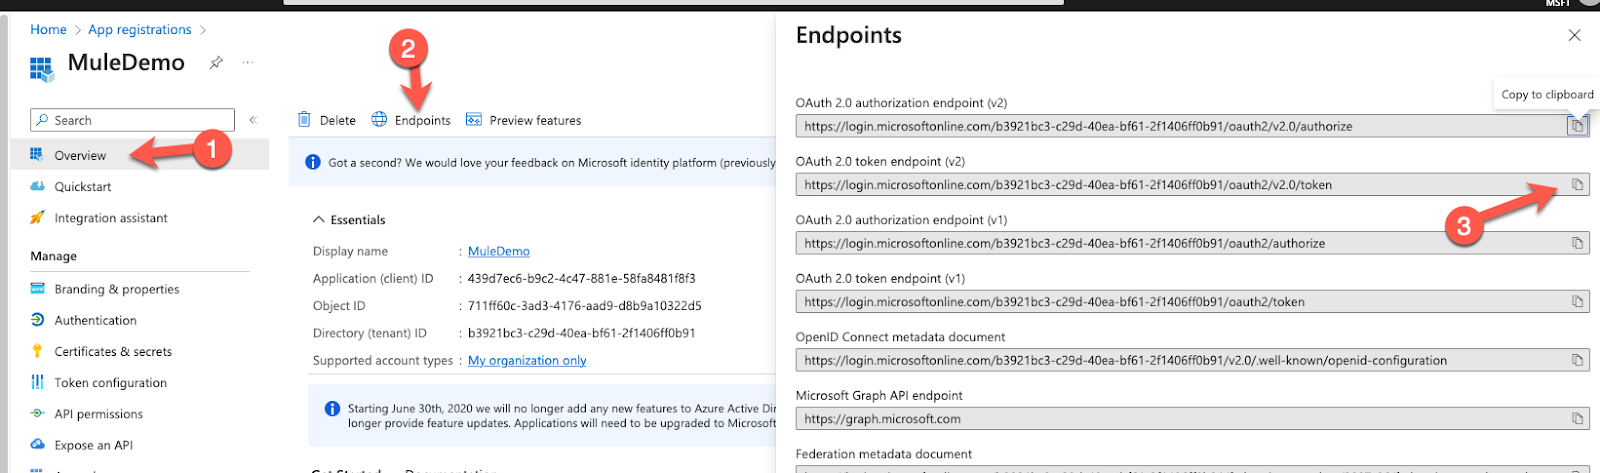
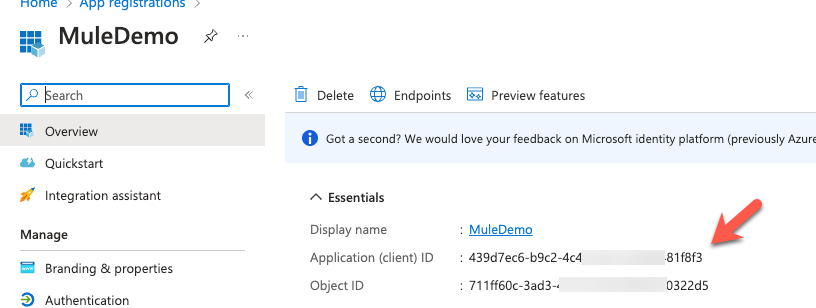
In the next screen, copy down the Application (client) ID (e.g. 439d7ec6-b9c2-4c47-881e-58fa8481f8f3). We'll need this when we configure the MuleSoft connector later.
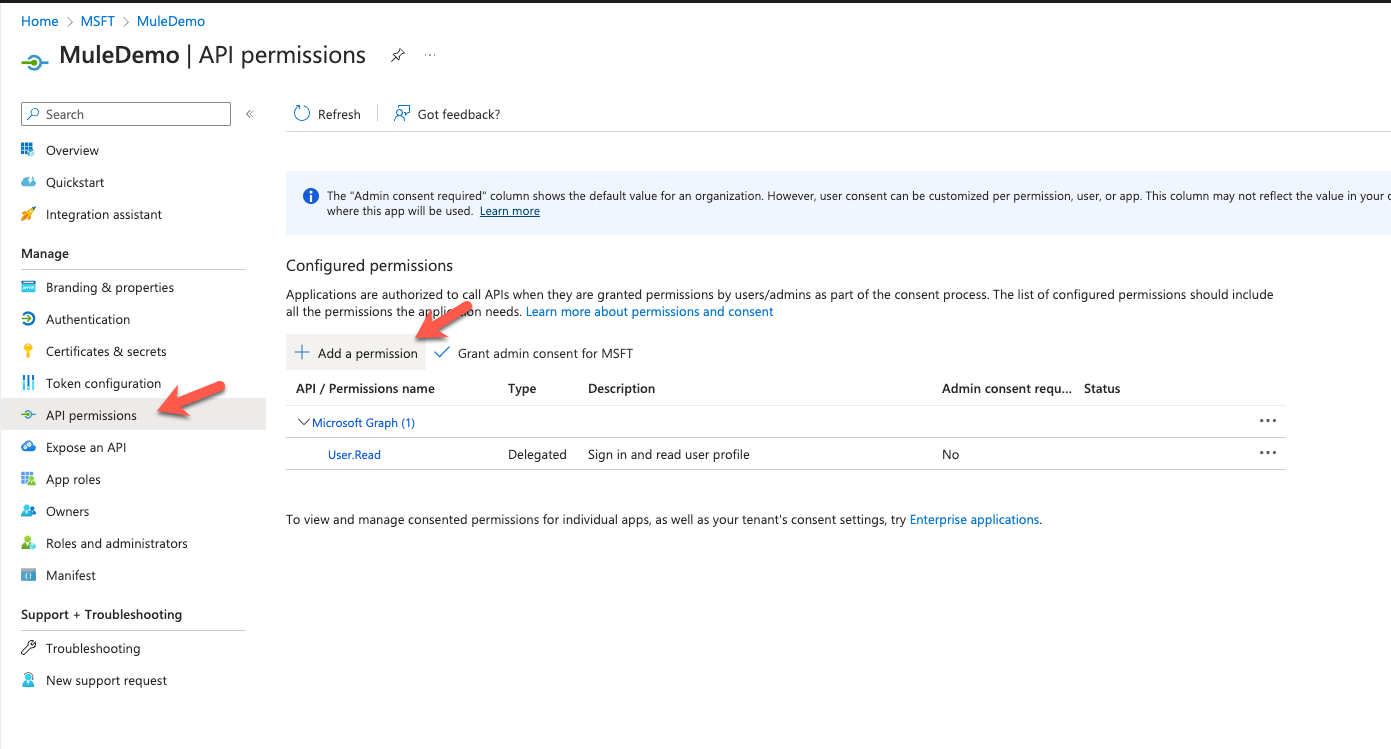
Under the Manage section, click on API permissions. Click on Add a permission
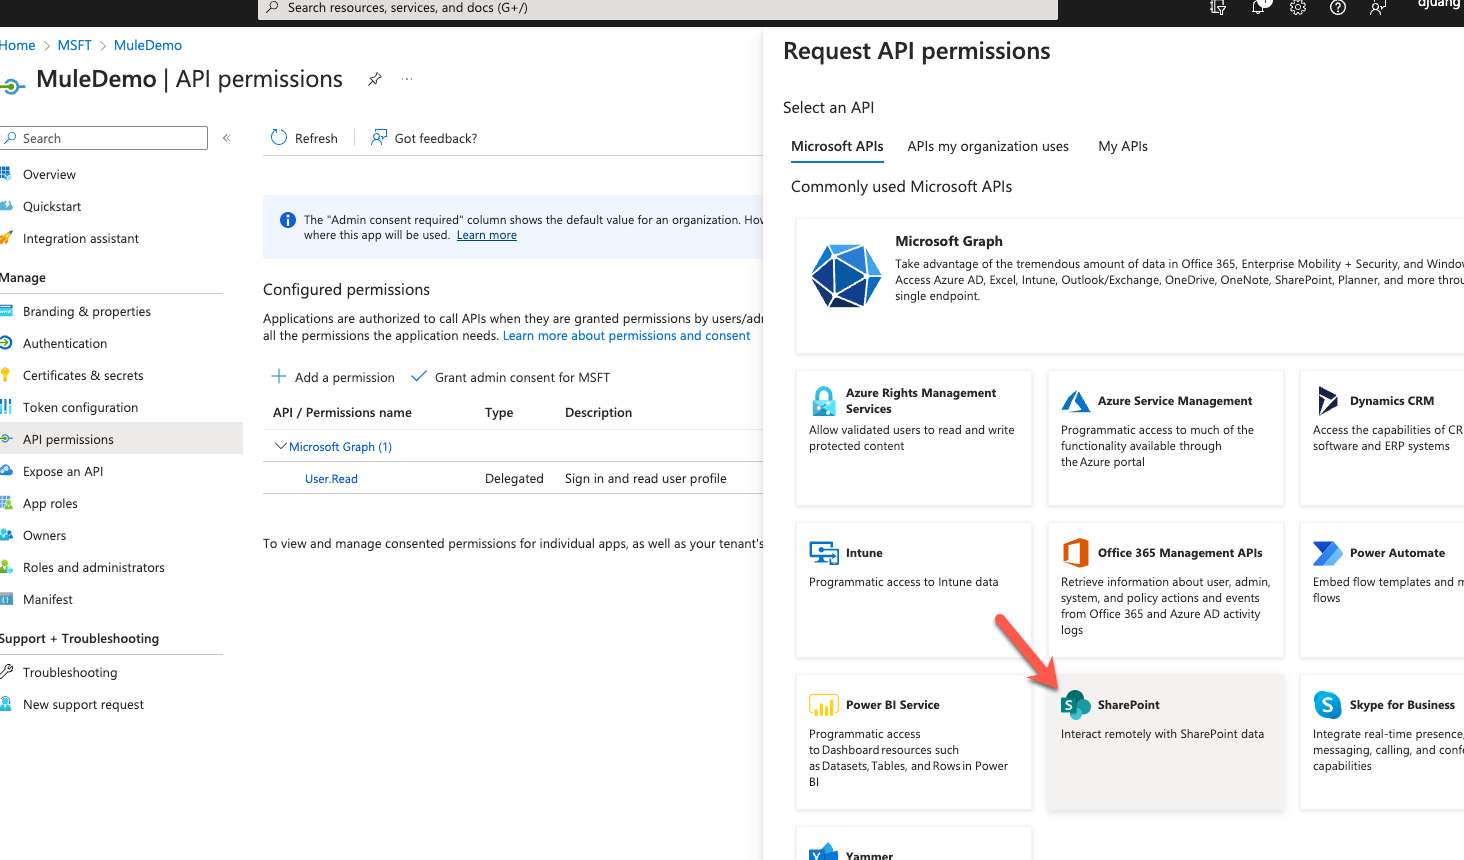
In the Request API permissions window, click on SharePoint
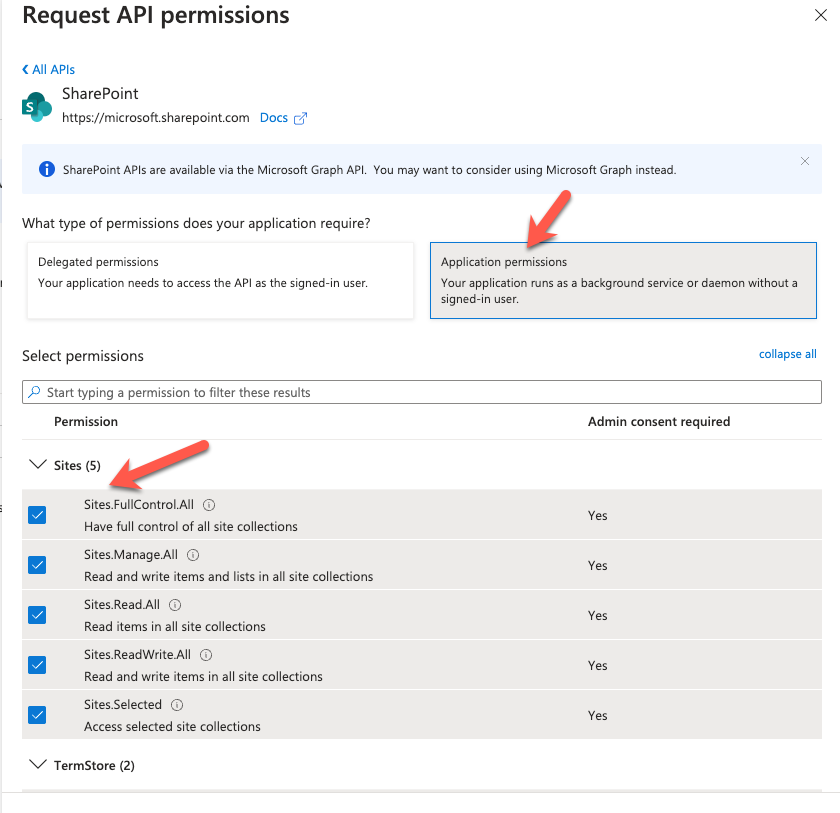
Click on Application permissions and check all the checkboxes before clicking on Add permissions.
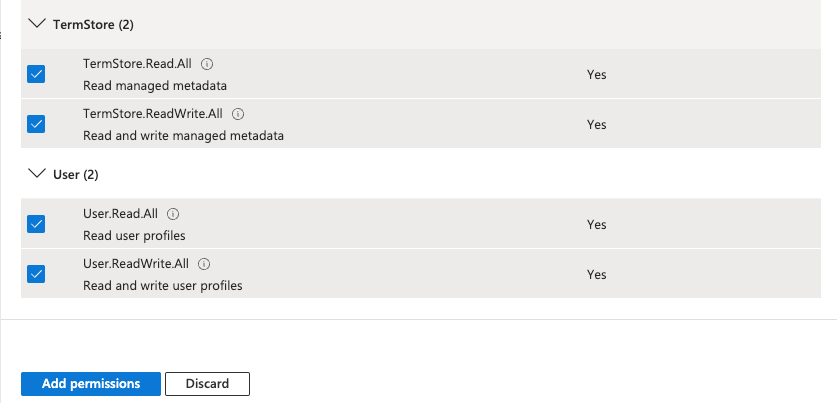
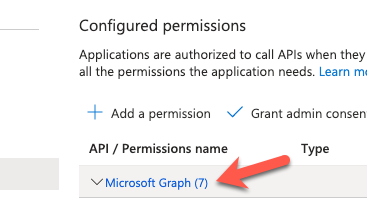
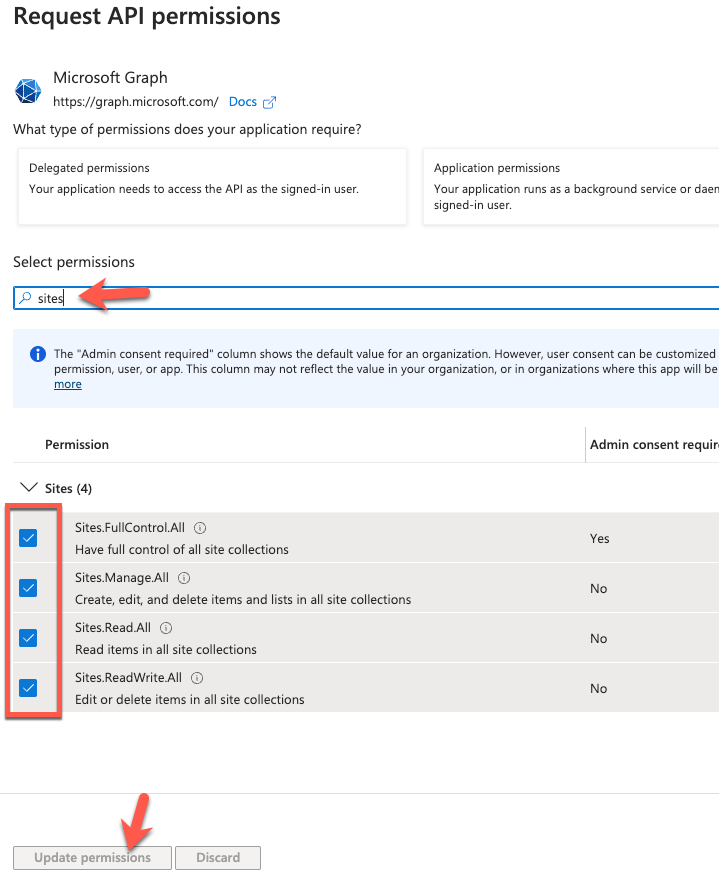
Back in the API permissions screen, click on Microsoft Graph
Enter in sites in the search box and select all the permissions. Click on Update permissions.
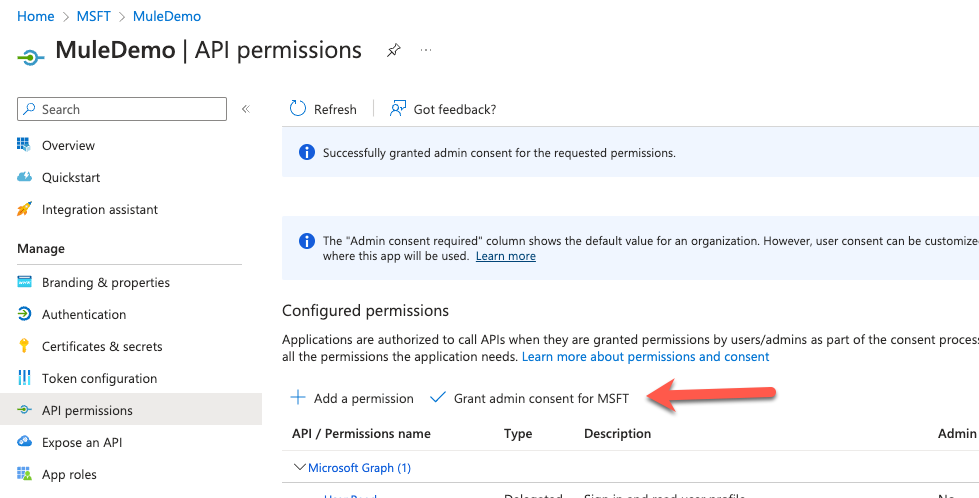
Now that we've add all the APIs that the API can call, click on Grant admin consent for <Parent Tenant>
In the left-hand navigation, under the Manage section, click on Certificates & secrets. Click on Upload certificate.
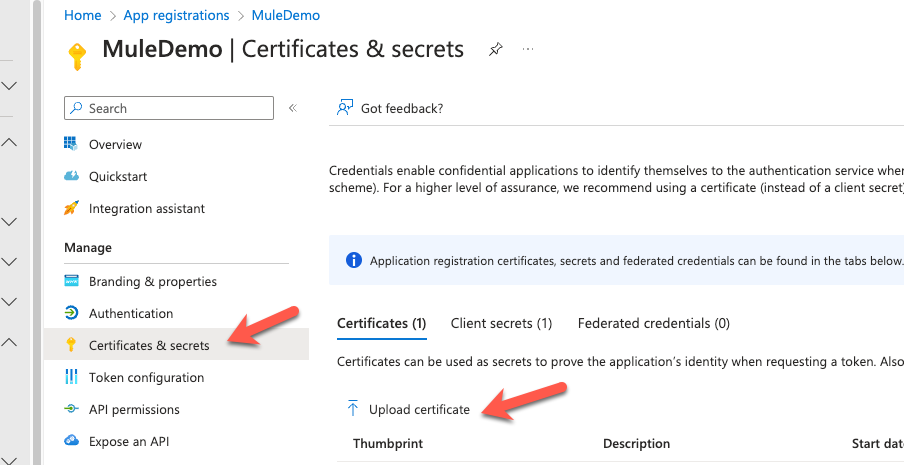
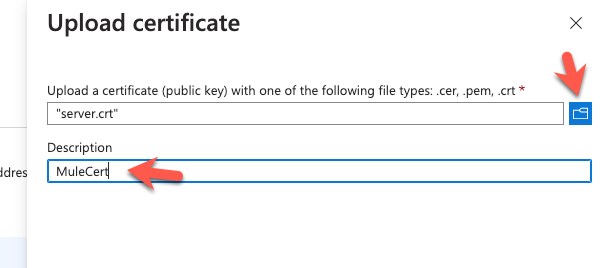
In the Upload certificate window, find the select the server.crt file that we created in the previous step. Give the certificate a name (e.g. MuleCert) and click on Add
Lastly, click on Overview and then click on Endpoints. You'll need to copy down the OAuth 2.0 token endpoint (v2) URL which we'll need when we configure the MuleSoft connector.
For the purpose of the codelab, we're going to create a very simple flow that gets the content of a single file and outputs that to the browser in plain text format.
Open Anypoint Studio and create a new Mule Project

In the New Mule Project window, give the project a name (e.g. sharepoint-example), select a Runtime, and then click on Finish
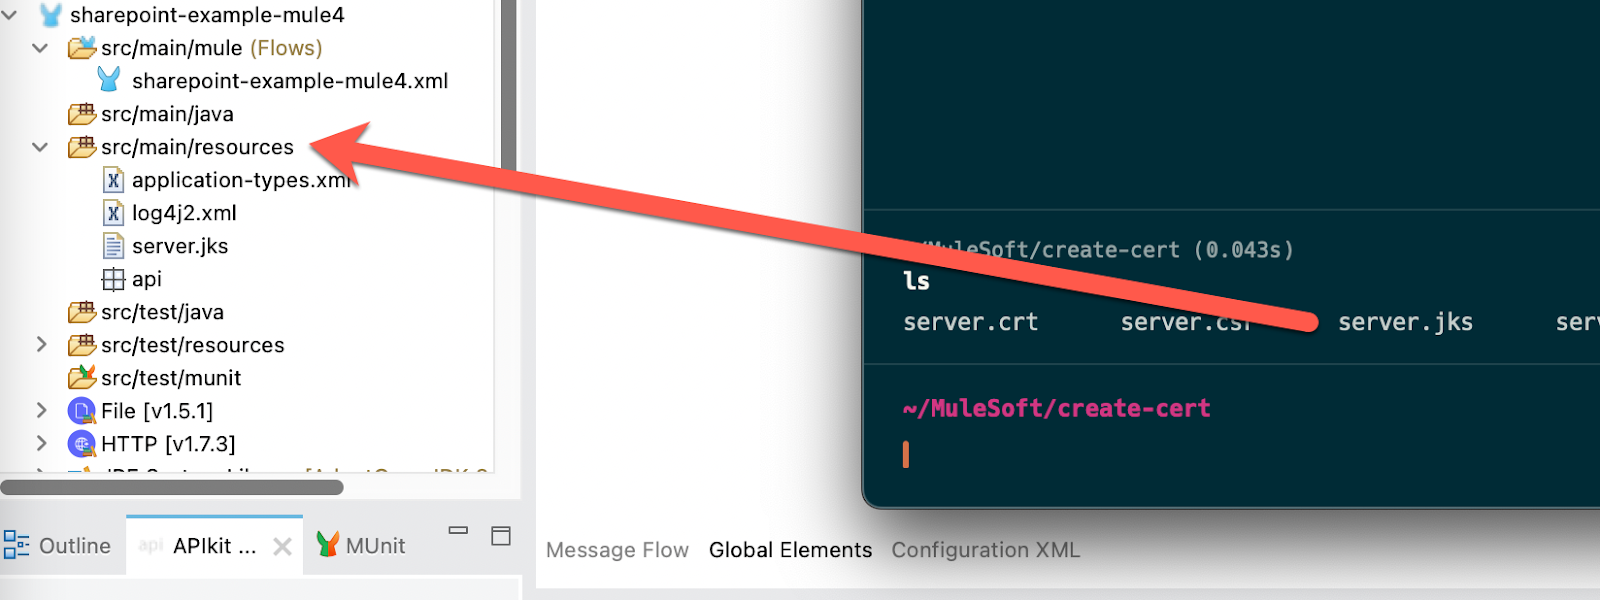
From the previous step where we created the Java Keystore, copy the server.jks file to the src/main/resources folder.
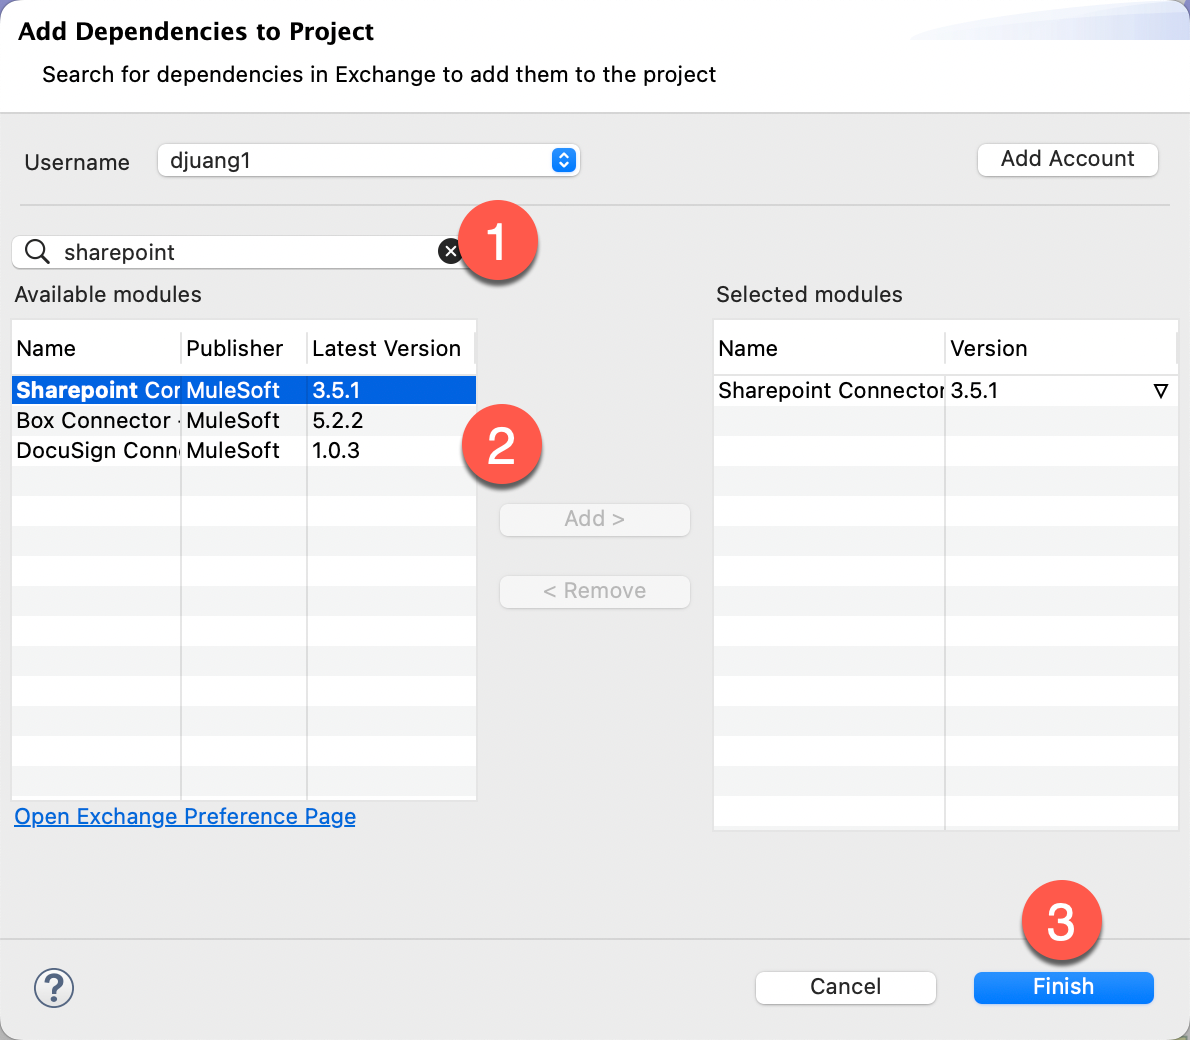
Next we want to add the SharePoint connector to the project. In the Mule Palette, click on Search in Exchange. In the window that pops up, search for sharepoint and select the SharePoint connector. Click on Add and then click on Finish.
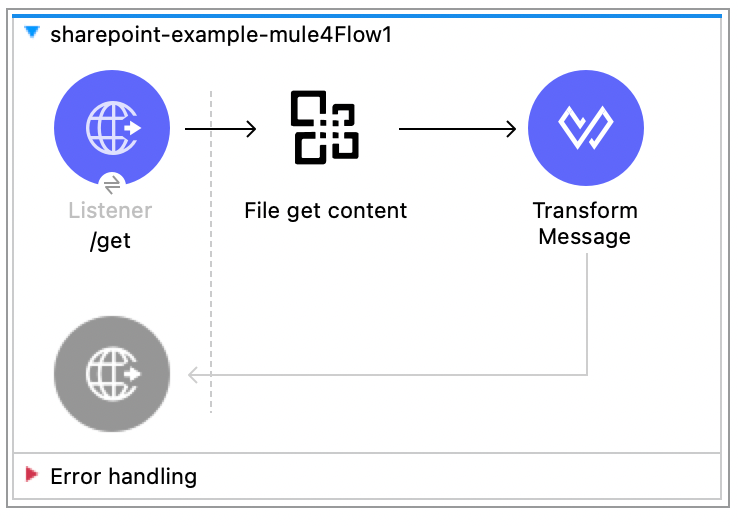
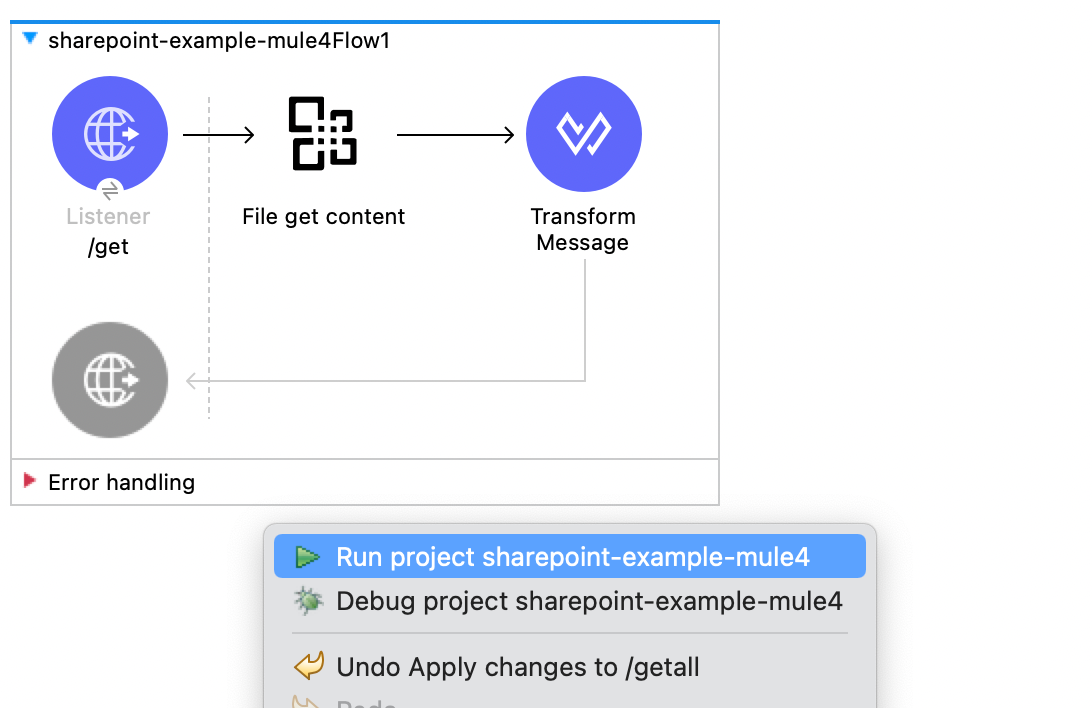
With the project created and the connector added to the project, let's create the flow. Drag and drop the following components into a new Mule project so it looks like the following screenshot:
- HTTP - HTTP Listener
- SharePoint - File Get Content
- Transform Message
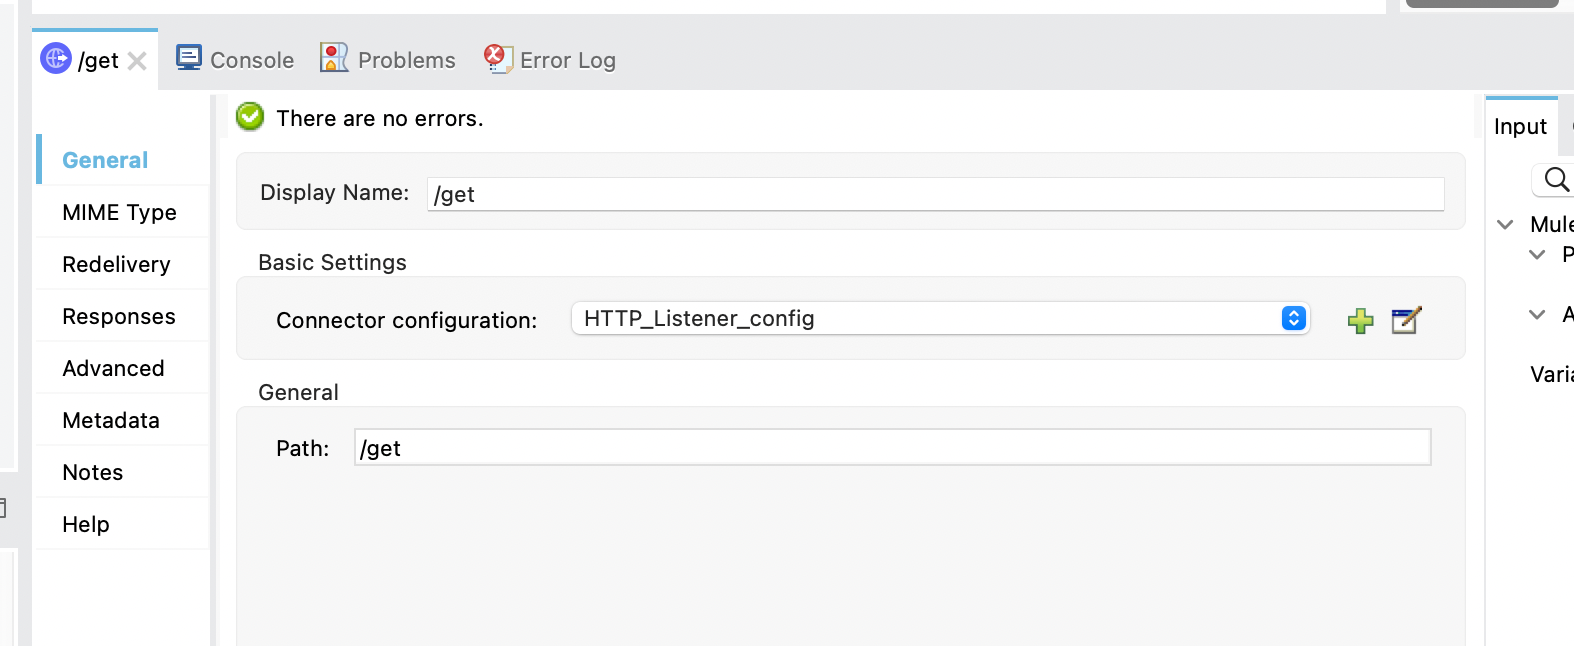
HTTP Listener
The configuration for the HTTP Listener operation will be pretty standard. For the config, leave the default protocol and port (e.g. http://localhost:8081)
For the path, set it to /get
SharePoint - File Get Content
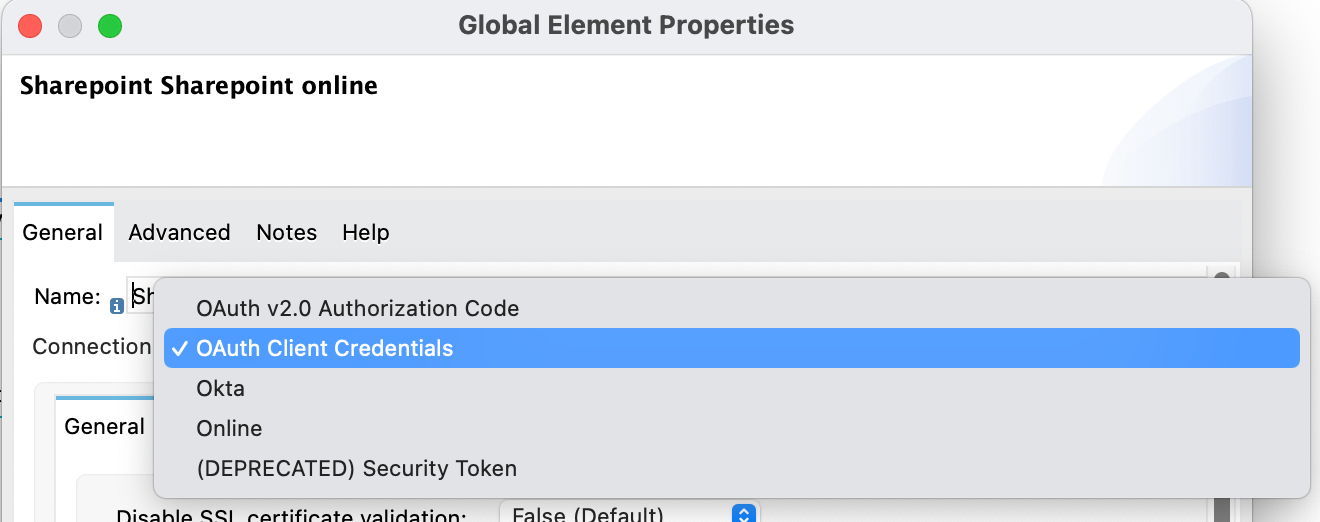
For the SharePoint Connector configuration, click on the green plus sign and select SharePoint online.
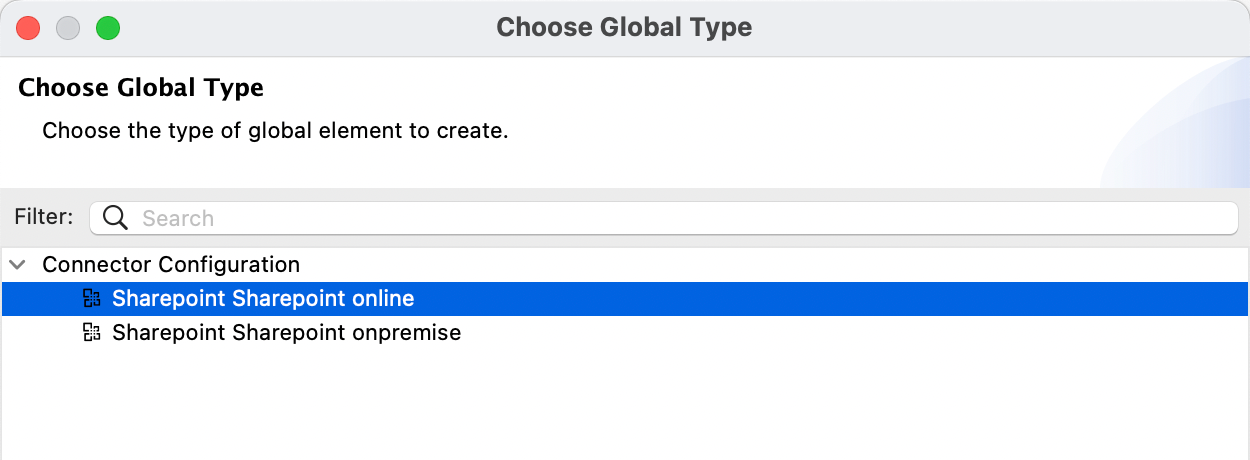
In the Global Element Properties window, set the Connection drop down to OAuth Client Credentials.
Configure the General tab according to the table below. Once configured, click on Test Connection... If configured correctly and the test is successful, click on OK
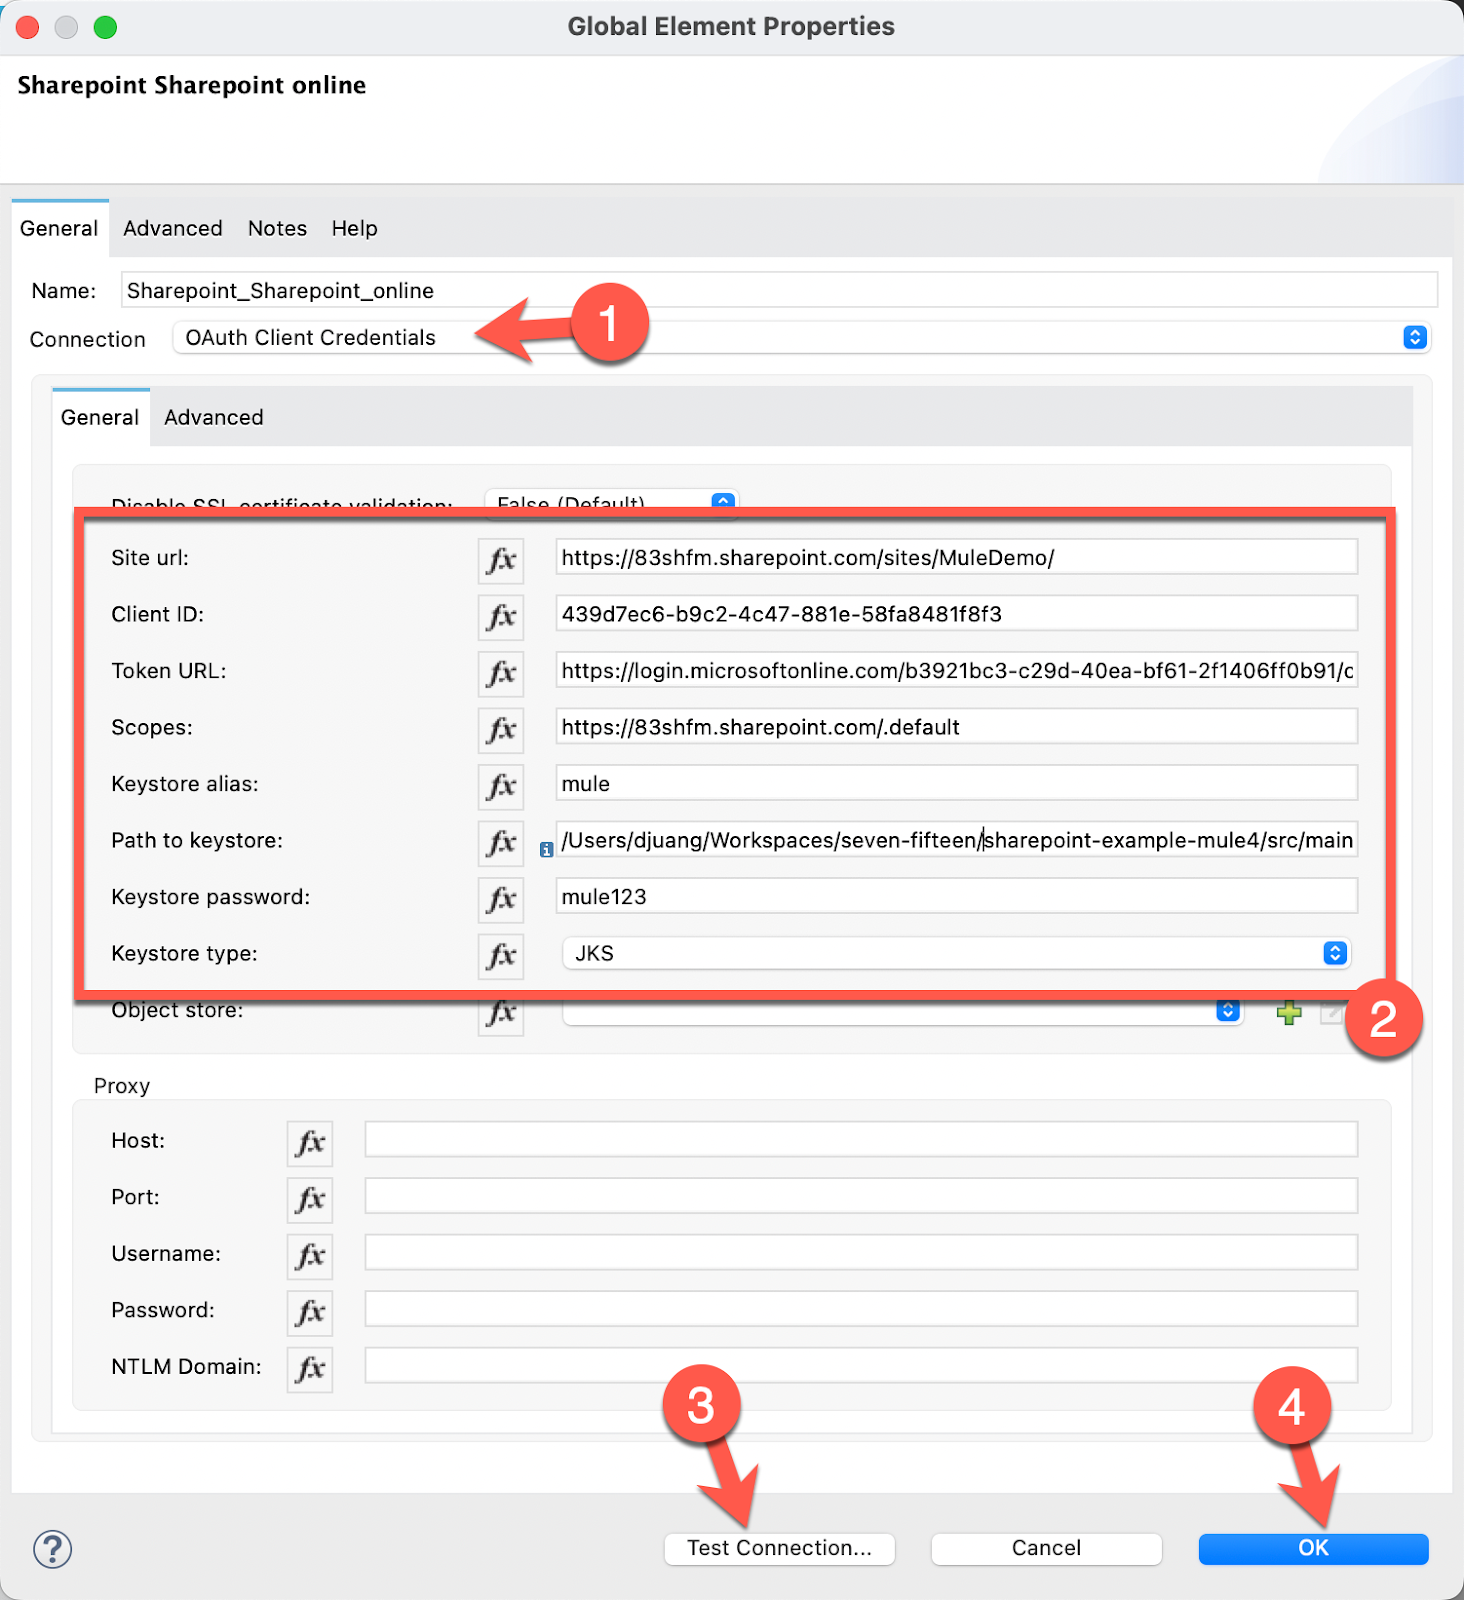
Site url | https://<domain name>.sharepoint.com/sites/<SharePoint site name>/ (e.g. https://83shfm.sharepoint.com/sites/MuleDemo/) |
Client ID | The Application (client) ID from the Setup SharePoint step (e.g. 439d7ec6-b9c2-4c47-881e-58fa8481f8f3)
|
Token URL | https://login.microsoftonline.com/<Directory (tenant ID>/oauth2/v2.0/token (e.g. https://login.microsoftonline.com/b3921bc3-c29d-40ea-bf61-2f1406ff0b91/oauth2/v2.0/token)
|
Scopes | https://<domain name>.sharepoint.com/.default (e.g. https://83shfm.sharepoint.com/.default) |
Keystore alias | Set in the Create Java Keystore with SSL Certificate step (e.g. |
Path to keystore | This needs to be the full path to the keystore file. (e.g. <Project Home>/sharepoint-example-mule4/src/main/resources/server.jks) |
Keystore password | Set in the Create Java Keystore with SSL Certificate step (e.g. |
Keystore type | JKS |

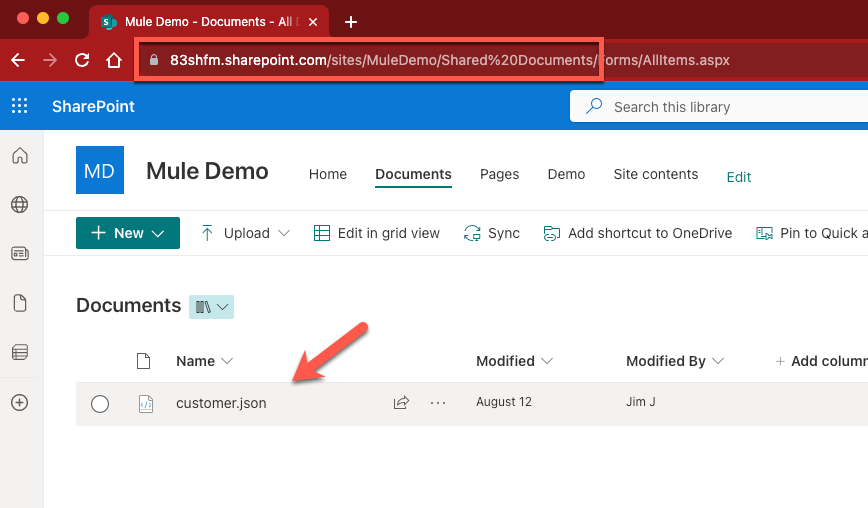
Back on the Mule properties tab for the File get content operation, set the File server relative url to the location of the file that we want to extract.

You can see how the URL is formatted based on the location of the file in SharePoint. I have a JSON file located in the Shared Documents folder so the URL would look like the following:
/sites/MuleDemo/Shared Documents/customer.jsonYou can download a copy of the JSON file here to drop into your SharePoint folder here.
Now the SharePoint connector is configured, let's set up how we want the content to be displayed.
Transform Message
For the Transform Message, we're just going to output the data in plain text format. The script should look like the following.
%dw 2.0
output text/plain
---
payload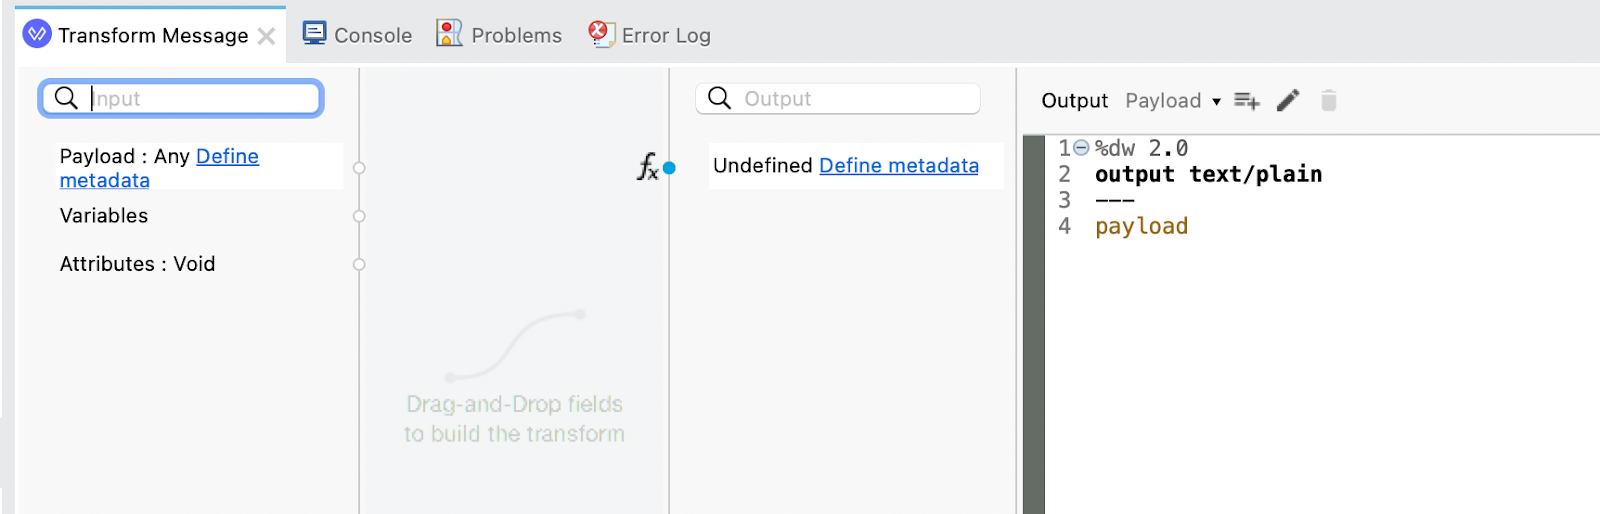
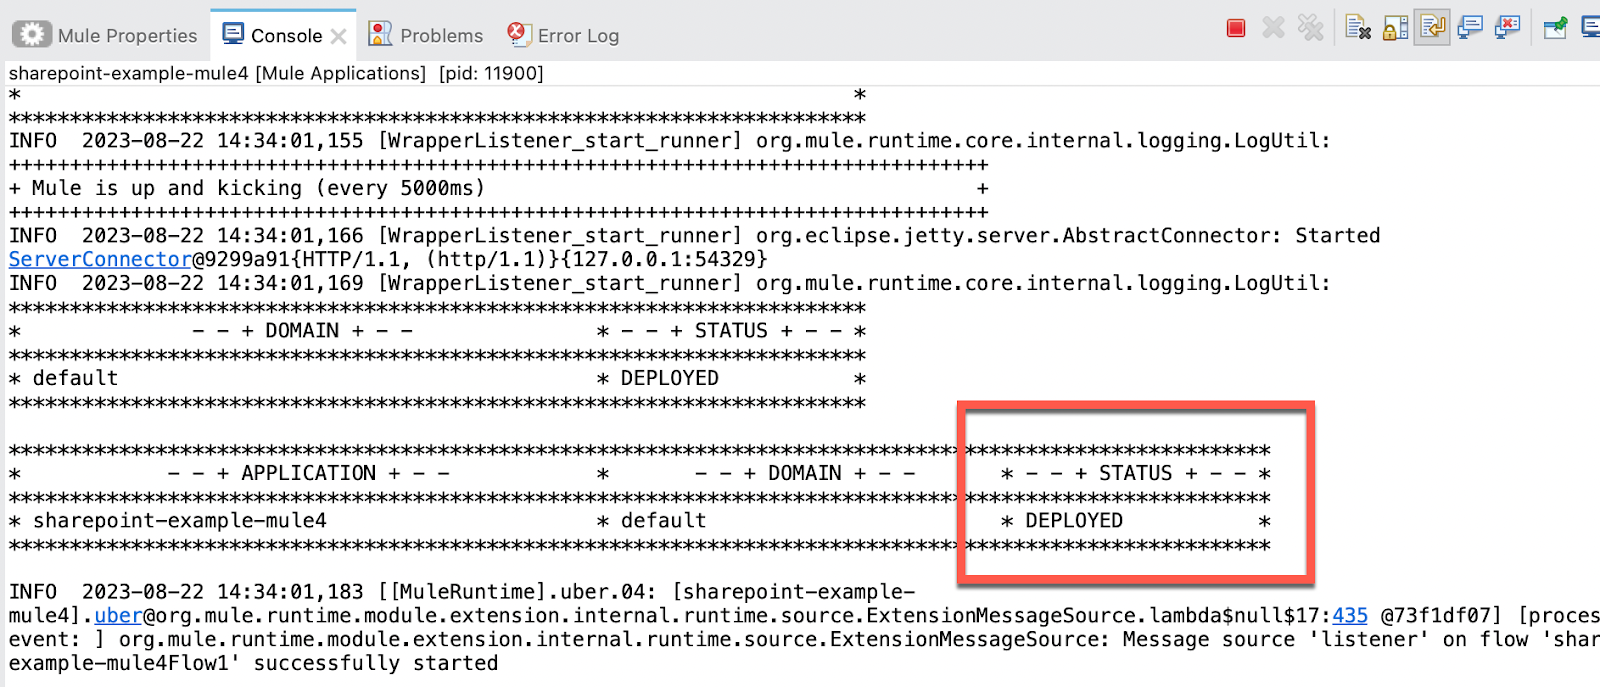
Let's test the application and see it in action. Right-click on the canvas and select Run project sharepoint-example
Once the app is successfully deployed, switch to a browser.
Navigate to the following URL
http://localhost:8081/get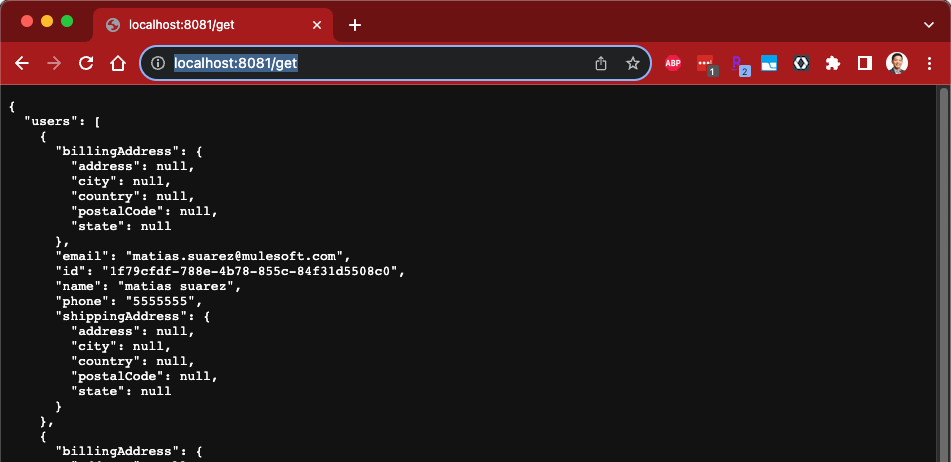
Congrats on completing the codelab! You successfully set up the SharePoint connector to leverage OAuth Client Credentials. Understanding how to set up the connector configuration is often the biggest hurdle.